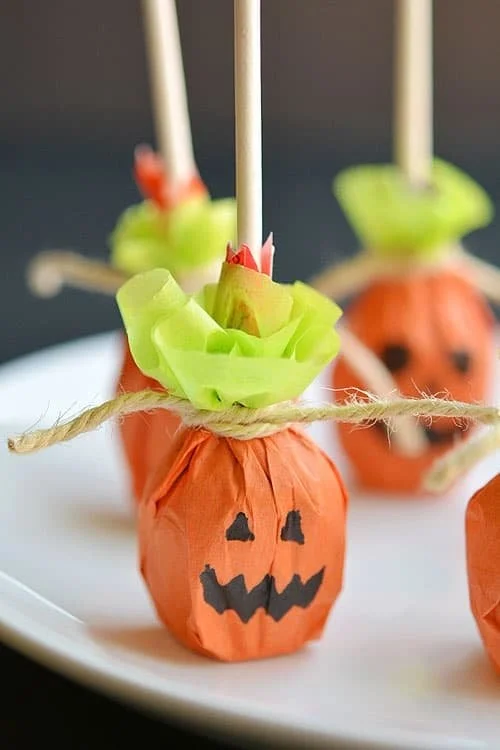
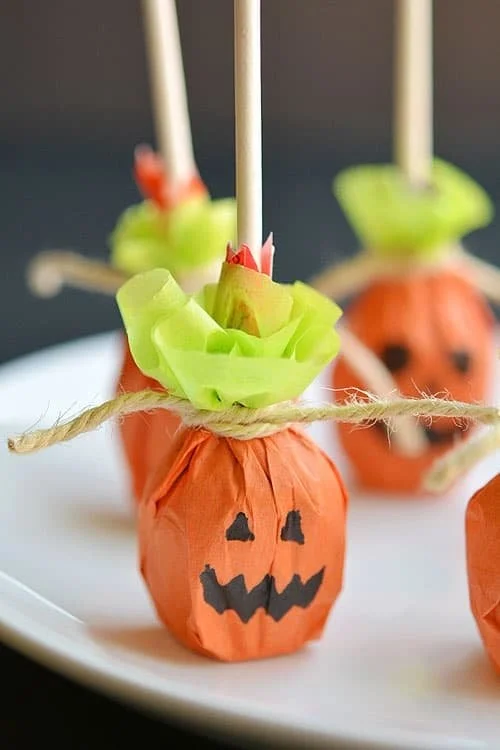
Lolly Pop Pumpkins
Lolly Pop Pumpkins are a delightful and easy DIY project that adds a festive touch to your autumn decor. This simple craft is perfect for beginners, requiring minimal materials and just a little time to create. Whether you’re looking to brighten up your home for Halloween or seeking budget-friendly crafts for your fall celebrations, these cute candy pumpkins fit the bill perfectly. Not only are Lolly Pop Pumpkins quick to make, but they also serve as charming decorations or delightful handmade gifts. Let’s dive into this creative DIY idea that will surely bring smiles to all ages!
WHY YOU WILL LOVE THIS Lolly Pop Pumpkins
Creating Lolly Pop Pumpkins is an enjoyable and rewarding process that anyone can master. Here are some reasons why you’ll love this easy craft:
- Easy for Beginners: This project requires no special skills, making it perfect for those just starting their crafting journey.
- Uses Simple Materials: With just a few items, you’ll be able to craft multiple pumpkins without breaking the bank.
- Budget-Friendly: This DIY project utilizes inexpensive materials, ensuring that you can decorate your space without overspending.
- Quick to Make: Each Lolly Pop Pumpkin takes minimal time to assemble, making it ideal for a last-minute seasonal decoration.
- Great for Home Decor: You’ll create cute and colorful decor that perfectly embodies the spirit of Halloween.
- Versatile for Gifts: These pumpkins make adorable handmade gifts for friends and family during the fall season.
- Easily Customizable: Lolly Pop Pumpkins can be decorated in various ways, allowing you to personalize them for fun!
PROJECT DETAILS
Skill Level
Beginner
This project is considered beginner-friendly and requires no special skills.
Estimated Time
30 minutes
You can easily create a handful of these pumpkins in about half an hour.
Approximate Cost
$10
Most of the materials are inexpensive, keeping the total cost low for multiple crafts.
Best For
Home decor, gifts, Halloween parties
Lolly Pop Pumpkins are perfect accents for your fall celebrations or as little gifts.
Project Type
Easy DIY
This project is classified as an easy craft that anyone can accomplish.
TOOLS AND EQUIPMENT NEEDED
Scissors
Scissors will be used to cut the tissue paper into circles for the pumpkins.
Marking Tool
A black fine tip Sharpie or a washable black marker is essential for adding faces to your pumpkins.
Twine
Twine will be used to secure the tissue paper around the lollipop, giving the pumpkin its shape.
MATERIALS
Tootsie Pop Lolly Pops
These round candies serve as the base of the pumpkins, providing shape and adding a sweet treat to your creations.
Orange Tissue Paper
Orange tissue paper is the primary material used to create the pumpkin’s body. You’ll cut circles to wrap around the lollipops.
Green Tissue Paper
The green tissue paper will form the pumpkin’s leafy top. A slightly larger circle of this paper is required.
Twine
Twine is used to hold the tissue paper in place around the lollipop, forming the pumpkin’s stem.
Fine Tip Black Sharpie or Washable Black Marker
This marker is used to draw jack-o’-lantern faces on the pumpkins, adding character and charm.
Large Smartie or Rockets Candy Money
This fun candy acts as a decorative element inside the pumpkin, adding to the overall aesthetic.
Buttons, Foam Craft Circles, or Flat White Breathmints
These can serve as eyes for your jack-o’-lantern faces, enhancing the appearance of your pumpkins.
HOW TO MAKE Lolly Pop Pumpkins
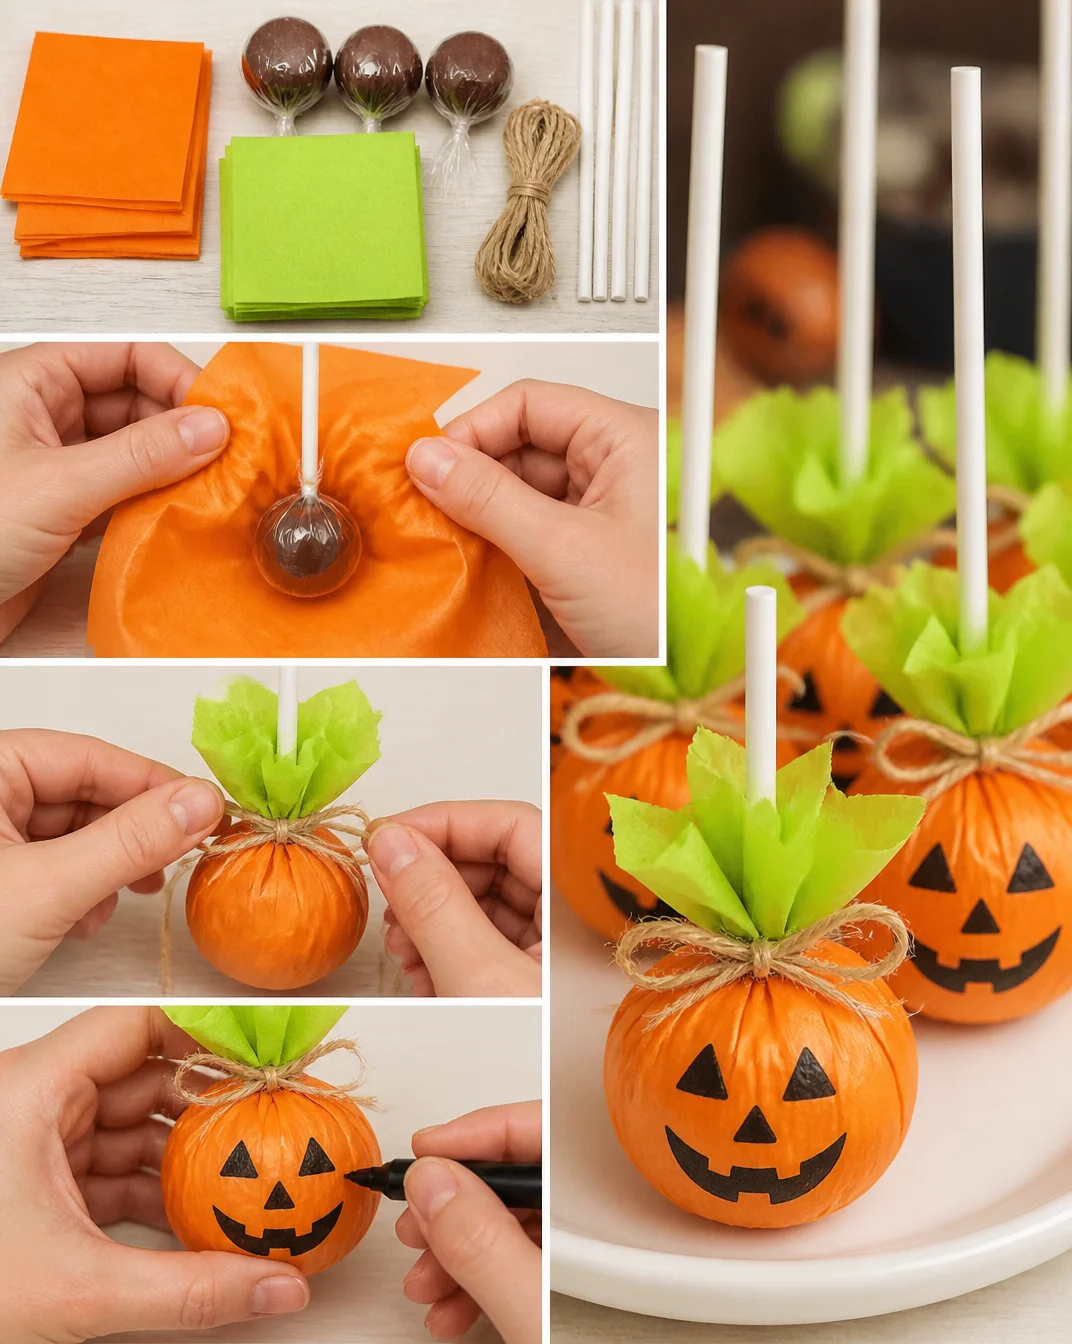
Step 1: Cut the Orange Circles
Start by cutting circles of orange tissue paper measuring about 4.5 inches in diameter. Since you’ll need two layers for each pumpkin, you can cut multiple layers at once for efficiency—up to 6 to 8 layers if your scissors allow it.
Step 2: Cut the Green Circle
Next, cut circles of green tissue paper about 5.5 inches wide. You only need one layer of this tissue per pumpkin. As with the orange tissue, try to cut through as many layers as you comfortably can.
Step 3: Stack the Layers
Take two of the orange circles you just cut and stack them. Place one green circle on top of the two orange circles.
Step 4: Add the Candy Money
In the center of the stacked tissue paper layers, place a piece of candy money. This will serve as a decorative element for your pumpkin.
Step 5: Insert the Lollipop
Now, set a Tootsie Pop Lolly Pop on top of the candy money. Make sure it sits right in the center of the layered tissue.
Step 6: Fold the Tissue Paper
Gently fold the two sides of the orange tissue paper around the lolly pop, holding it in place and creating the pumpkin shape.
Step 7: Pinch the Top
Pinch the top where the orange and green tissue paper meet. This secures the shape of your pumpkin as you prepare to tie it off.
Step 8: Secure with Twine
Cut a piece of twine, about 12 inches long, and wrap it around the lolly pop twice. Tie the twine securely to hold the tissue paper in place.
Step 9: Add Faces
Finally, use your fine-tip Sharpie or washable black marker to draw fun jack-o’-lantern faces on the pumpkins. You can let kids get creative with this part!
TIPS AND TRICKS
- Choosing Materials: When selecting your tissue paper, make sure to purchase good-quality paper that holds its shape well. Look for vibrant colors for a festive look.
- Cutting Techniques: If you’re cutting paper for a group project, pre-cut your circles in advance to speed up the crafting session for everyone involved.
- Avoiding Mistakes: One common mistake is pinching too tightly when tying the twine. You want the tissue paper to be secure but not overly tight, as this could tear the paper.
- Improving Appearance: To get a cleaner finish, ensure you cut your tissue paper circles evenly, as this will affect how the final pumpkin looks.
- Saving Money: Keep an eye out for multi-packs of lollipops on sale. Purchasing in bulk can save you money if you plan to create many Lolly Pop Pumpkins.
- Longevity Tips: Store your finished pumpkins in a cool, dry place to ensure the tissue paper holds up well and retains its vibrant color.
- Working Safely: Always handle scissors with care and keep them out of reach of young children unless supervised.
VARIATIONS AND CUSTOMIZATION IDEAS
- Different Colors: Experiment with various tissue paper colors such as purple or yellow to create unique pumpkins that can fit other seasons or themes.
- Larger Sizes: Create larger pumpkins by increasing the diameter of your tissue paper circles, perfect for table centerpieces.
- Themed Versions: For a Halloween-themed party, consider adding more spooky elements like googly eyes or different facial expressions.
- Material Swaps: Instead of using tissue paper, try using fabric scraps for a sturdier version of the pumpkins.
- Seasonal Updates: Adapt Lolly Pop Pumpkins for Thanksgiving by changing the facial expressions to something more suitable for fall themes.
- Personalized Versions: Decorate the pumpkins with names or initials to use as party favors with a personal touch.
Lolly Pop Pumpkins FAQ
How difficult are Lolly Pop Pumpkins to make?
These pumpkins are beginner-friendly and can be made with basic cutting and tying techniques, making them accessible for all skill levels.
What materials do I need?
You will need Tootsie Pops, orange and green tissue paper, twine, a fine-tip black marker, and candy money or buttons for decoration.
How do I store the finished Lolly Pop Pumpkins?
Store your completed pumpkins in a cool, dry place away from direct sunlight. This will help maintain their vibrant colors and prevent any damage to the tissue.
Can I use different materials for this project?
Absolutely! You can experiment with fabric, patterned paper, or even upcycled materials to create unique Lolly Pop Pumpkins.
How long does it take to make a batch of Lolly Pop Pumpkins?
You can expect to spend about 30 minutes to an hour to create multiple pumpkins, depending on your speed.
CONCLUSION
Lolly Pop Pumpkins are the perfect easy DIY project for anyone looking to add some festive flair to their home decor or create charming gifts for friends and family. With simple materials and step-by-step instructions, anyone—regardless of crafting experience—can enjoy this beginner-friendly craft. Take the opportunity to personalize your pumpkins and add a splash of creativity to your Halloween celebrations.
Try making these delightful pumpkins and feel free to share your experiences and finished products with others. Happy crafting!
Lolly Pop Pumpkins
Ingredients
Method
- Cut circles of orange tissue paper measuring about 4.5 inches in diameter.
- Cut circles of green tissue paper about 5.5 inches wide.
- Stack two orange circles and place one green circle on top.
- Place a piece of candy money in the center of the stacked layers.
- Insert a Tootsie Pop on top of the candy money.
- Gently fold the orange tissue paper around the lollipop to create the pumpkin shape.
- Pinch the top to secure the shape of the pumpkin.
- Cut a piece of twine, wrap it around the lollipop, and tie it securely.
- Use the fine-tip Sharpie or washable black marker to draw fun jack-o'-lantern faces.