Candy Filled Balloon Pumpkins
If you’re looking for an easy DIY project that adds a festive touch to your home decor this Halloween, consider making candy-filled balloon pumpkins. This budget-friendly craft is simple enough for beginners and provides a fun way to celebrate the season. Not only do these pumpkins look adorable, but they also serve as delightful treats for parties or as seasonal decorations. With just a few materials and straightforward instructions, you can create your own unique variations. Let’s dive into this creative DIY idea!
WHY YOU WILL LOVE THIS CANDY FILLED BALLOON PUMPKINS
Making candy-filled balloon pumpkins is an enjoyable and engaging experience that anyone can try. Here are a few reasons why you will love this craft:
- Easy for Beginners: This craft uses simple techniques and materials, making it a perfect choice for those new to DIY projects.
- Uses Simple Materials: You probably have most of the materials at home, which means minimal shopping is needed.
- Budget-Friendly: This is an inexpensive project since the materials are affordable and accessible.
- Quick to Make: You can complete this project in under 30 minutes, making it a great choice for a fun afternoon activity.
- Great for Home Decor: These festive pumpkins can brighten up any room or serve as unique centerpieces for your Halloween gatherings.
- Perfect for Parties: Fill them with your favorite Halloween candy and bring them to any autumn celebration for a sweet treat.
- Easy to Customize: You can create various styles and designs, allowing for creative expression.
PROJECT DETAILS
Skill Level
Beginner-Friendly: This project doesn’t require advanced crafting skills, making it perfect for those just starting with DIY projects.
Estimated Time
30 Minutes: With easy steps and minimal drying time, you can complete this craft in under 30 minutes.
Approximate Cost
$10 – $15: The total cost is low due to the inexpensive materials needed for this easy craft.
Best For
Home Decor and Gifts: These decorations can be used in your home, gifted to friends, or served at parties as fun treats.
Project Type
Seasonal Craft: This DIY project is perfect for Halloween and can be displayed during the entire spooky season.
TOOLS AND EQUIPMENT NEEDED
Sharpie
A black Sharpie is used to draw faces on the pumpkins, allowing you to express creativity by crafting spooky or friendly looks.
Double-Sided Tape
This tape helps secure the green tissue paper as the pumpkin’s stem, making it easier than glue for a quick assembly.
MATERIALS
Orange Balloons (12 Inch Balloons)
These balloons form the base for your pumpkins. The bright orange color mimics traditional pumpkin hues, making them festive.
Halloween Candy
Filling the balloons with your favorite candy adds an element of surprise and sweetness, perfect for any Halloween gathering.
Green Tissue Paper
This material is ideal for creating the pumpkin stems. It’s lightweight, easy to work with, and adds a touch of greenery to your pumpkins.
Sharpie
Utilized for drawing faces on the pumpkins, a Sharpie lets you add personality and charm to each creation.
Double-Sided Tape
This convenient tape is great for attaching the tissue paper and will secure the craft without any mess.
HOW TO MAKE CANDY FILLED BALLOON PUMPKINS
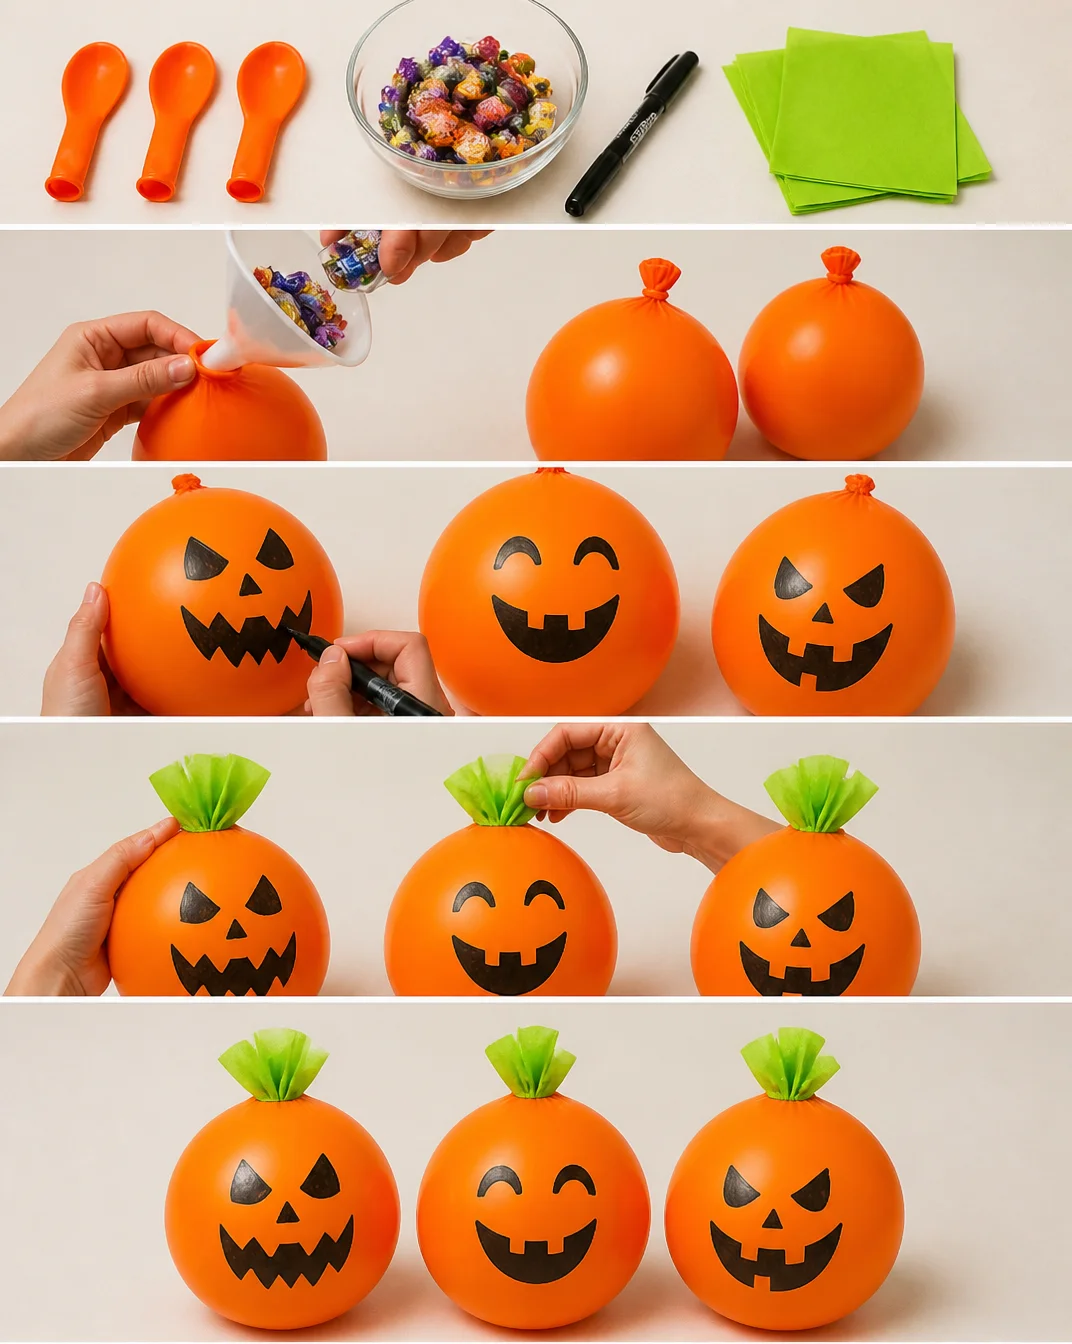
Creating candy-filled balloon pumpkins is both an enjoyable and straightforward process. Follow the steps below to make your own.
Step 1: Prepare the Balloons
Start by gathering your materials. Take an orange balloon and stretch it slightly by inflating it fully for a moment and then letting the air out. Doing this helps the balloon hold its shape better when filled.
Step 2: Fill the Balloons with Candy
Carefully open the balloon’s neck and start adding your favorite Halloween candy inside. If you’re using candy with sticks, be cautious to avoid damaging the balloon while filling it up.
Step 3: Inflate the Balloon
Once filled, blow up the balloon until it reaches a size you like. You can let some air out to create the perfect round pumpkin shape.
Step 4: Create the Stem
Cut a 2-inch-wide strip of green tissue paper. Fold this strip several times and snip fringe along one edge. Unfold it to create a textured look, which will be the pumpkin stem.
Step 5: Assemble Your Pumpkin
Wrap the green tissue paper around the knot of the balloon and secure it with the double-sided tape. This will create a fun and whimsical pumpkin top.
Step 6: Draw the Faces
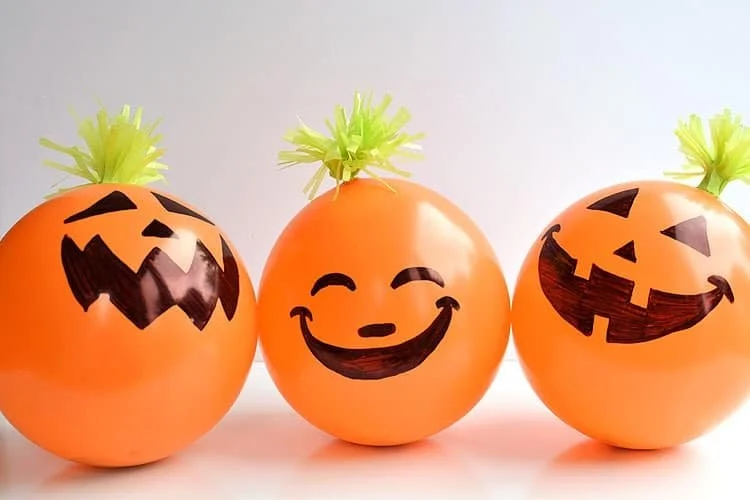
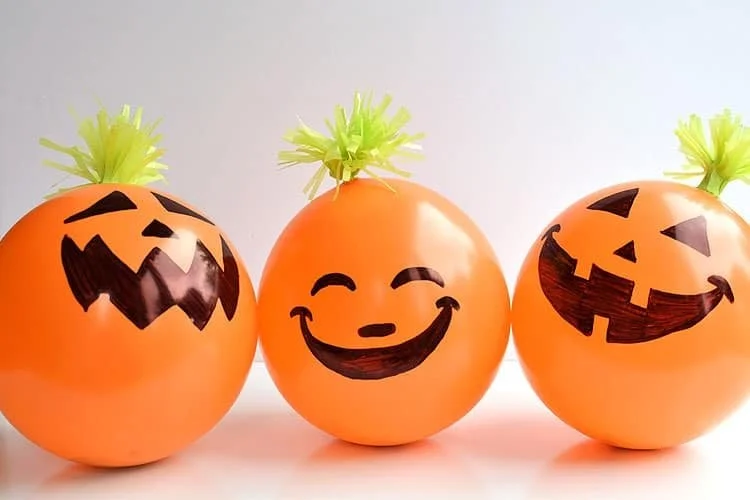
Using the black Sharpie, draw faces on the pumpkin balloons. You can make them spooky or friendly, depending on your vision for the decor.
Step 7: Optional Glow Effect
For a fun nighttime effect, add glow sticks inside the balloons before sealing them. This will create an enchanting glow for your pumpkins.
TIPS AND TRICKS
- Choosing Materials: Select balloons that are thick enough to avoid popping easily. Look for those that are specifically designed for crafts.
- Cutting Tissue Paper: When cutting the green tissue paper, try to cut small fringes; this adds texture and mimics real pumpkin stems.
- Avoiding Common Mistakes: Take care when filling the balloons. If you overfill them, they may become too tight and more likely to pop.
- Making the Craft Last Longer: Store your finished pumpkins in a cool, dry place. Avoid direct sunlight, which may cause the balloons to fade or burst.
- Working Safely: If you are working with young children, supervise them during the crafting process to ensure they handle the materials safely.
VARIATIONS AND CUSTOMIZATION IDEAS
Feel free to customize your candy-filled balloon pumpkins with these fun ideas:
- Different Colors: Try using balloons in various fall colors such as yellow, green, or even patterned ones for unique looks.
- Different Sizes: Experiment with various balloon sizes to create mini pumpkins or large ones for different effects.
- Seasonal Versions: Adapt the design for other seasons or holidays by using different colors and shapes, like hearts for Valentine’s Day.
- Different Faces: Use paint or other types of markers to achieve different styles of faces, allowing for more artistic expression.
- Personalized Versions: Add names or initials to the pumpkins to create a unique twist for a gift idea.
CANDY FILLED BALLOON PUMPKINS FAQ
What skill level do I need for this project?
This project is beginner-friendly and doesn’t require complex skills or tools.
How long does it take to make these pumpkins?
You can create candy-filled balloon pumpkins in about 30 minutes.
Can I use other types of candy?
Yes! You can fill your pumpkins with any candy you like, just be mindful of the size and shape.
How do I store these finished crafts?
Store the pumpkins in a cool, dry place, ideally in a box to prevent them from getting crushed.
Are these pumpkins safe for kids?
Yes, this craft is safe for children as long as they are supervised when using small materials like scissors and balloons.
CONCLUSION
Candy-filled balloon pumpkins are a delightful and easy craft to make this Halloween. This beginner-friendly project requires only a few inexpensive materials and can be completed in under 30 minutes. Perfect for seasonal decorating or sweet treats at a party, you can customize these pumpkins to match your style and requirements. So gather your supplies and start creating your unique decorations! Don’t forget to share your experiences and any creative variations you’ve designed. Happy crafting!
Candy Filled Balloon Pumpkins
Ingredients
Method
- Start by gathering your materials.
- Take an orange balloon and stretch it slightly by inflating it fully for a moment and then letting the air out.
- Carefully open the balloon's neck and start adding your favorite Halloween candy inside.
- Inflate the balloon until it reaches a size you like.
- Cut a 2-inch-wide strip of green tissue paper, fold it several times and snip fringe along one edge.
- Wrap the green tissue paper around the knot of the balloon and secure it with the double-sided tape.
- Using the black Sharpie, draw faces on the pumpkin balloons.
- Optionally, add glow sticks inside the balloons before sealing them for a glowing effect.