How to Make Halloween Tea Lights
Halloween is an exciting time filled with fun, creativity, and the perfect opportunity to make memorable decorations. If you’re looking for a simple yet charming way to light up your Halloween evenings, consider making Halloween tea lights. This easy DIY project requires minimal materials and time, making it a fantastic option for both beginners and crafting pros alike. In this guide, we’ll walk you through creating adorable black cat-themed tea lights that will add a warm glow to your home decor or make delightful handmade gifts. Let’s dive into this fun and budget-friendly DIY craft!
WHY YOU WILL LOVE THIS Halloween Tea Light Project
Making Halloween tea lights is not only enjoyable but also highly rewarding. Here are some reasons why you’ll love this craft:
- Easy for Beginners: This project is beginner-friendly, making it perfect for those new to crafting. You don’t need any special skills to create beautiful decorations.
- Uses Simple Materials: All materials are easy to find and inexpensive, turning this into a budget-friendly craft.
- Quick to Make: You can complete this project in around an hour or so, making it ideal for last-minute decorations or gifts.
- Great for Home Decor: These tea lights serve as delightful decorations that enhance your Halloween ambiance, perfect for parties or cozy nights at home.
- Easy to Customize: Don’t feel limited to black cats; you can create various designs like jack-o’-lanterns, ghosts, and more, showcasing your creativity.
PROJECT DETAILS
Skill Level
This project is easy and perfect for beginners. You don’t need prior crafting experience, making it a great way to start your DIY journey.
Estimated Time
You can expect to spend about 1 hour making these tea lights. The painting may require some drying time, but the hands-on crafting process is quick and enjoyable!
Approximate Cost
This DIY project is budget-friendly, with materials costing around $10. You may even have some supplies at home, making it even more economical.
Best For
These Halloween tea lights are ideal for home decor, festive gatherings, and holiday celebrations. They also make thoughtful handmade gifts for friends and family.
Project Type
This is a seasonal craft, perfect for Halloween decorating, and offers a fun way to celebrate the holiday.
TOOLS AND EQUIPMENT NEEDED
Scissors
Scissors are essential for cutting the black felt into ear shapes for the cat tea light. Make sure you have a good pair that cuts cleanly.
Glue Gun
A glue gun is crucial for attaching various parts of your tea light. It’s an easy-to-use tool that provides a strong bond for your craft.
Paintbrush
A paintbrush is needed to apply the acrylic paint smoothly on the tea light surface. Choose a medium-sized brush for even coverage.
Mixing Palette (Optional)
While not mandatory, a mixing palette can help you blend colors if you’re planning on adding more custom designs or variations.
MATERIALS
Battery Operated Tealight Candle
The base of your Halloween tea light, a battery-operated candle provides a safe way to add light without any risk of fire.
Acrylic Paint (Black, White, Yellow)
You will need black paint for the body of the cat, white for the eyes and mouth, and yellow for pupils. Acrylic paint ensures good coverage and vibrancy.
Black Felt
This material will be used to create the cat’s ears, adding a fun and textured element to your tea light.
Paintbrush
You’ll need a paintbrush to apply the acrylic paint to the tea light. A medium-sized brush will help with both detailed work and coverage.
Scissors
Scissors are necessary for cutting the felt. A sharp pair will make it easier to achieve clean edges.
Glue Gun
A glue gun will bond the felt ears securely to the sides of the tea light. Ensure you have glue sticks for the gun ready.
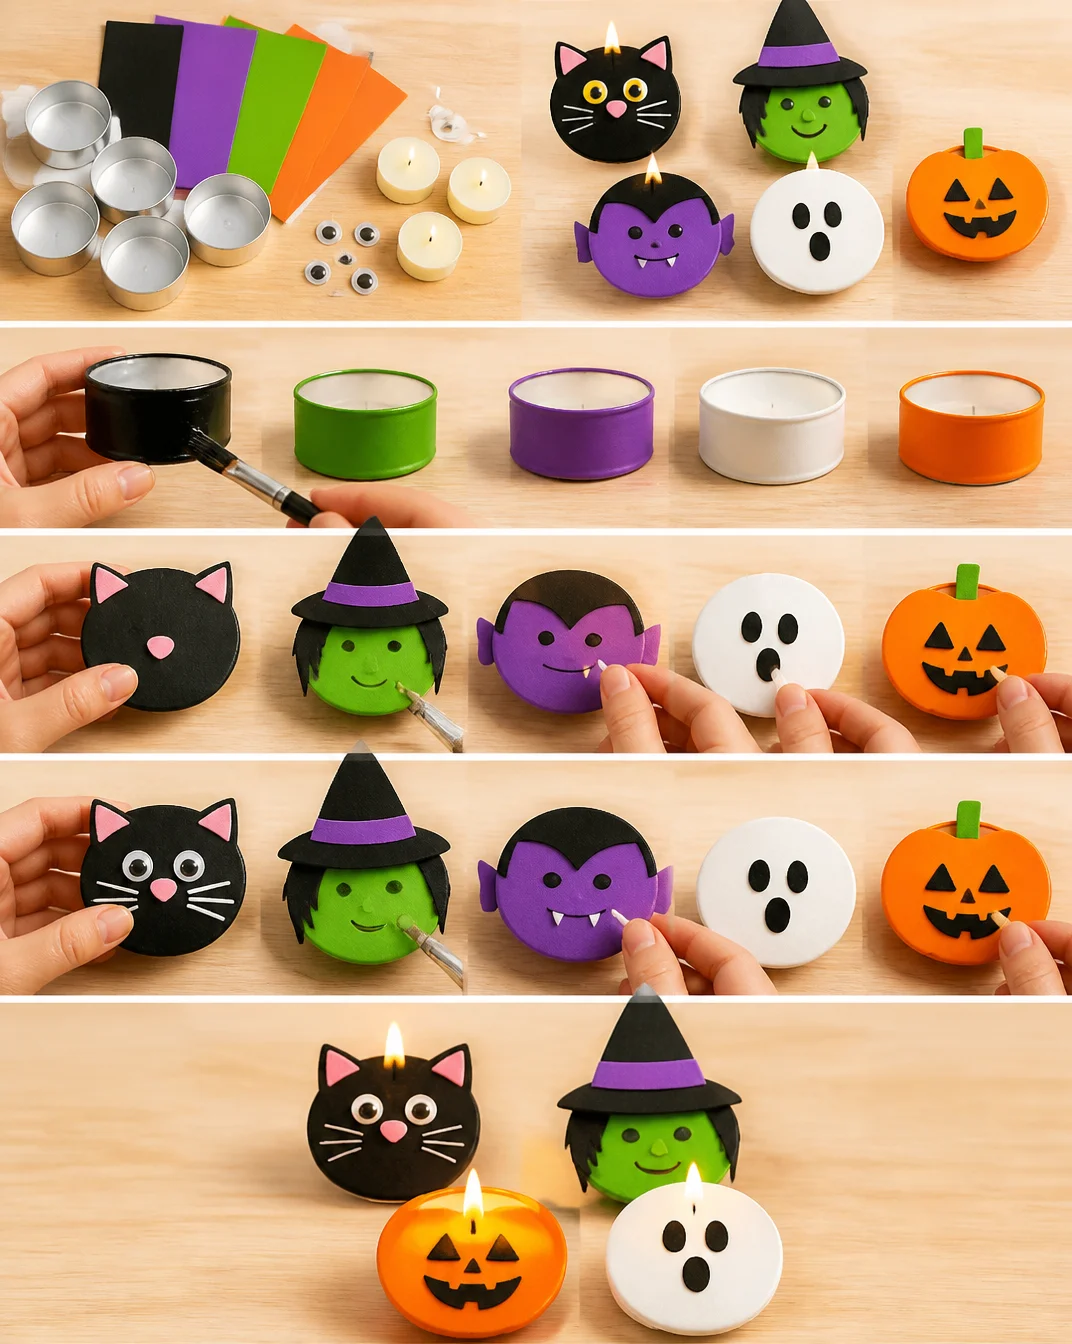
HOW TO MAKE Halloween Tea Lights
Follow these simple steps to create your charming Halloween tea lights.
Step 1: Prepare Your Work Area
Find a clean, flat surface to work on. Lay down a protective covering if desired, as paint can be messy. Gather all your materials and tools.
Step 2: Paint the Candle
Using the paintbrush, apply black acrylic paint around the flame area of the tea light candle, covering both the top and sides thoroughly.
Step 3: Allow to Dry
Set your painted tea light aside to dry. You might need about 10 to 15 minutes for the first coat to dry, depending on your climate.
Step 4: Add Additional Coats
If necessary, apply a second coat of black paint to ensure solid coverage. After that, let it dry completely again. If you feel that more coverage is needed, a third coat can be applied.
Step 5: Add Facial Features
Once the black paint is dry, use the white acrylic paint to add two cat eye shapes on the front. Then, paint a rounded mouth and lines for whiskers. Allow this layer to dry.
Step 6: Paint the Pupils
Now, take your yellow or green paint and add pupils to the eyes by making small dots. Allow to dry thoroughly.
Step 7: Create Ears from Felt
Cut a 1 by 2 inch piece of black felt. Fold it in half and cut out a triangle with a rounded bottom for the cat ears.
Step 8: Attach Ears
Add a thin line of glue to the bottom of one felt ear and attach it to the side of the candle above one of the eyes. Repeat this step with the second ear on the other side.
Step 9: Let It Dry
Finally, let the glue dry fully before moving or displaying your new Halloween tea light.
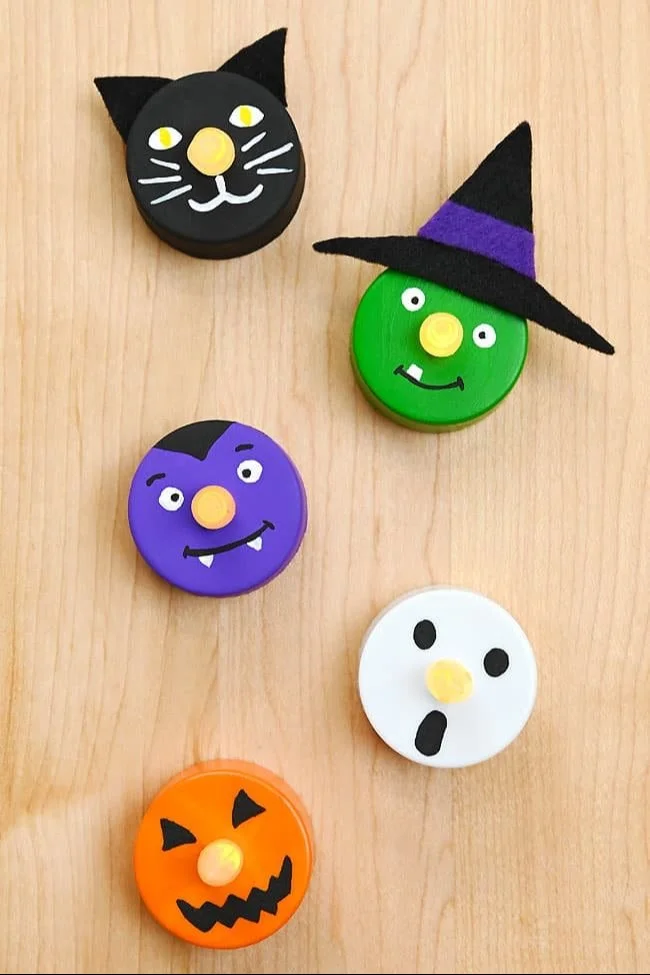
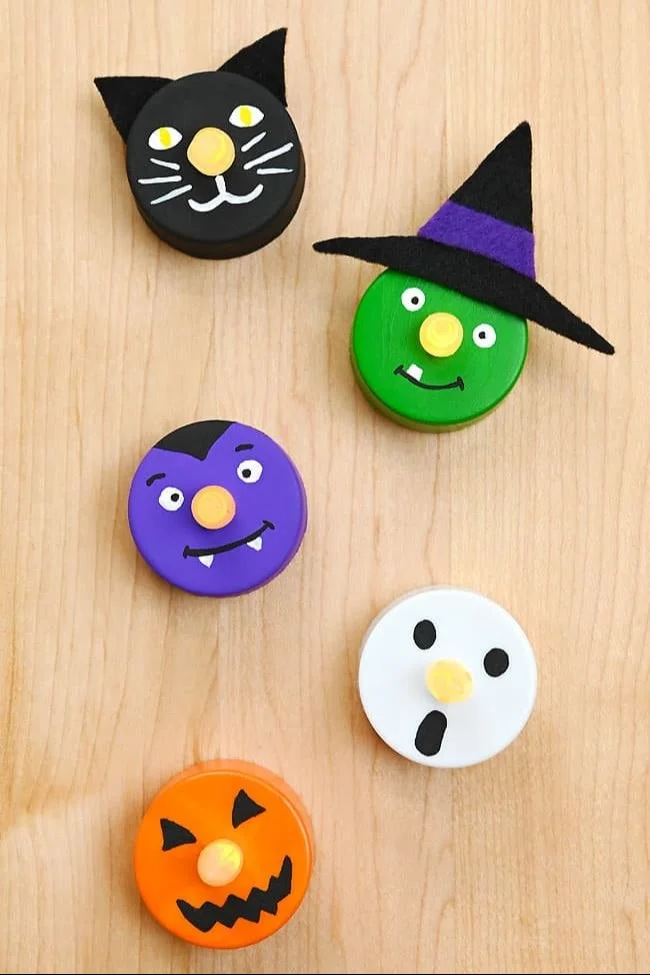
Now, your charming black cat Halloween tea light is ready! You can also create different designs, such as a jack-o’-lantern or ghost, for added fun.
TIPS AND TRICKS
- Choosing Materials: Use quality acrylic paints for better coverage and durability. You can also experiment with glow-in-the-dark paint for a unique touch.
- Cutting and Assembling: Before cutting the felt, sketch your ear shapes on paper for reference. This can avoid common mistakes in cutting.
- Avoiding Common Mistakes: Ensure that each layer of paint is fully dry before applying the next for better results. Rushing can lead to smudging.
- Getting a Better Finish: Use a foam brush for an even paint application if you want a smooth finish. This can prevent brush strokes from showing.
- Making the Craft Last Longer: To enhance durability, consider spray sealing the painted areas after everything is completely dry.
- Working Safely: When using a glue gun, be cautious of the hot glue, and avoid direct contact with your skin.
VARIATIONS AND CUSTOMIZATION IDEAS
Feel free to personalize your Halloween tea lights with these ideas:
- Different Colors: Use orange or purple paint for a jack-o’-lantern or witch-themed tea light.
- Different Sizes: Adjust the size of your candles and felt pieces to create various sized decorations.
- Seasonal Versions: Create tea lights for other holidays by changing the theme, like hearts for Valentine’s or bunnies for Easter.
- Different Patterns: Instead of a cat, try painting a ghost or vampire for a fun twist.
- Personalized Versions: Write a name or word such as "Boo!" or "Spooky!" on your tea light for a custom touch.
Halloween Tea Lights FAQ
Q1: How difficult is this craft?
A: This craft is easy and perfect for beginners. You need no advanced skills, making it approachable for anyone.
Q2: What materials do I need?
A: You will need a battery-operated tealight candle, black, white, and yellow acrylic paint, black felt, scissors, a paintbrush, and a glue gun.
Q3: How long does it take to complete this project?
A: The overall time to make these tea lights is about 1 hour, including drying time for the paint.
Q4: How should I clean and store these tea lights?
A: You can wipe them down gently with a damp cloth to keep them clean. Store them in a dry place to maintain their quality.
Q5: Can I customize the designs further?
A: Absolutely! You can experiment with different colors, patterns, and themes. Get creative with your decorations!
CONCLUSION
Creating Halloween tea lights is a fun, easy DIY project that anyone can enjoy. It uses simple materials and minimal tools, making it accessible for crafters of all skill levels. This budget-friendly craft allows you to add festive charm to your home decor and makes for thoughtful handmade gifts. So gather your supplies, unleash your creativity, and enjoy making these delightful tea lights. Don’t forget to share your creations and customization ideas with friends and family! Happy crafting!
Halloween Tea Lights
Ingredients
Method
- Step 1: Prepare your work area with a clean surface and protective covering.
- Step 2: Paint the candle using black acrylic paint along the flame area.
- Step 3: Allow to dry for 10 to 15 minutes.
- Step 4: Apply a second coat of black paint, allowing it to dry completely.
- Step 5: Add facial features with white paint, then allow to dry.
- Step 6: Paint the pupils with yellow or green paint.
- Step 7: Create ears from a black felt by cutting out shapes.
- Step 8: Attach ears using the glue gun.
- Step 9: Let the glue dry completely before displaying.