Egg Carton Halloween Crafts – Easy Bat, Ghost, Spider, & More!
Are you ready to get crafty this Halloween? One of the best seasonal craft ideas is creating delightful decorations from something as simple as egg cartons. In this article, we will explore Egg Carton Halloween Crafts, including easy bats, ghosts, spiders, and more! These easy DIY projects are perfect for adults and kids alike. Let’s dive into some creative DIY ideas that are both fun and budget-friendly!
WHY YOU WILL LOVE THIS Egg Carton Halloween Crafts
Making Egg Carton Halloween Crafts is not only enjoyable but also incredibly satisfying. Here are a few reasons why this project will catch your fancy:
- Easy for beginners: The crafts are straightforward and do not require advanced skills.
- Uses simple materials: You only need basic supplies that you likely already have at home.
- Budget-friendly: Repurposing old egg cartons is a cost-effective way to create festive decorations.
- Quick to make: Most of these crafts can be completed in under an hour.
- Great for home decor: They make charming seasonal decorations that bring a festive spirit to your space.
- Easy to customize: You can add your unique touch to each craft easily.
PROJECT DETAILS
Skill Level
Beginner-friendly. No prior crafting experience is necessary.
Estimated Time
Approximately 30–60 minutes, depending on the number of crafts you choose to make.
Approximate Cost
Under $10. Most of the materials are common household items.
Best For
This project is ideal for families, classrooms, or anyone looking for budget-friendly crafts for Halloween.
Project Type
Seasonal crafts and DIY home decor.
TOOLS AND EQUIPMENT NEEDED
Scissors
Used to cut the egg carton into pieces needed for the crafts.
Paintbrushes
Required for applying paint to the egg carton pieces for decoration.
Glue
You will need craft glue or hot glue to hold your projects together.
Cupcake Liners (optional)
These can be used as decoration or to make the spiders’ bodies.
MATERIALS
Egg Cartons
The primary material for this project. You can use either cardboard or foam egg cartons.
Paint
Black, white, and other colors of your choice for decorating the crafts.
Markers
To add details like eyes or patterns once the paint dries.
Googly Eyes (optional)
These can make your Halloween crafts even more fun and lively.
String or Yarn (optional)
Used for hanging some of the crafts, such as ghosts or bats.
Glitter or Stickers (optional)
For additional decoration and sparkle.
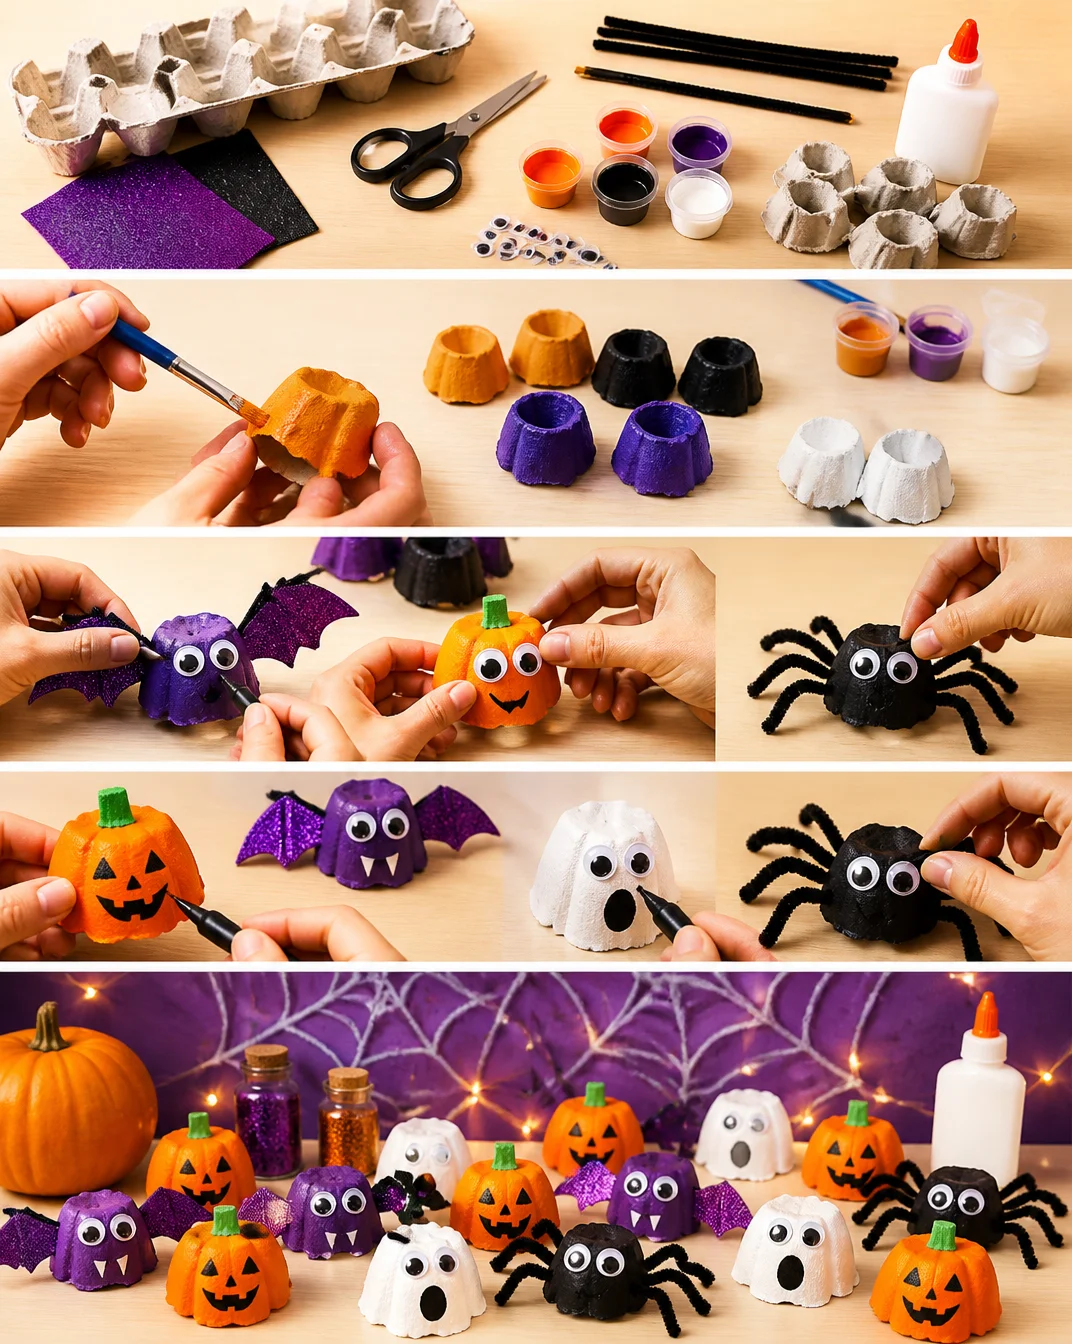
HOW TO MAKE Egg Carton Halloween Crafts
Now, let’s get into the fun part: making the crafts! Follow these easy DIY instructions for each Halloween-themed project.
Step 1: Create Bats
- Cut the Egg Carton: Use scissors to cut the egg carton into sections with two cups for the bat’s body and wings.
- Paint the Body: Paint the cups black and let them dry completely.
- Add Wings: Cut out bat wings from another egg carton section, then paint and glue them to the bat’s body.
- Finish Up: Add googly eyes and any additional decoration like glitter or stickers to bring your bat to life!
Step 2: Make Ghosts
- Prepare the Cups: Take a single cup from the egg carton and cut it down to the desired height.
- Paint White: Paint the cup white and allow it to dry.
- Add a Face: Use a marker to draw a spooky face on your ghost.
- Create a Hanging Loop: Cut a length of string or yarn, poke a small hole in the top of the cup, and tie the string through for hanging.
Step 3: Assemble Spiders
- Cut the Bottom Piece: Take one of the egg carton cups and cut off the top, leaving a base.
- Paint the Body: Paint the cut piece black or any color you prefer.
- Add Legs: For legs, cut pipe cleaners into equal lengths and poke them into the sides of the cup.
- Details: Finally, glue googly eyes on the top to give your spider some character.
Step 4: Create a Pumpkin
- Use Two Cups: Take two egg carton cups and paint them orange to form the pumpkin shape.
- Stack and Glue: Stack them on top of each other and glue them in place.
- Add a Stem: Cut a small piece from a stick or bottle cap to serve as the pumpkin’s stem and glue it on top.
- Decorate: You can draw or add stickers for additional pumpkin features like a face or vines.
TIPS AND TRICKS
- Choosing Materials: Ensure you use clean egg cartons. Remove any leftover egg residue and let them dry thoroughly.
- Cutting and Gluing: Be careful while using scissors. A craft knife may be helpful for detailed cuts, but always supervise children with sharp tools.
- Get Creative: Don’t hesitate to use alternative colors or patterns. It’s an easy craft, and the more unique you make it, the more fun it will be!
- Store Properly: Store your completed crafts in a dry place, especially if they are painted, to avoid smudging.
- Involve Kids: This is a great way for children to express their creativity and practice their fine motor skills.
VARIATIONS AND CUSTOMIZATION IDEAS
Here are a few ideas on how to customize your Egg Carton Halloween Crafts:
- Different Colors: Instead of the traditional colors for ghosts and pumpkins, try pastels or metallic paints for a unique look.
- Add Patterns: Use stamps or sponges to create patterns like polka dots or stripes.
- Make Larger Versions: Instead of using standard egg cartons, look for larger containers or stack two or more together.
- Change Shapes: Craft other Halloween characters, such as witches or mummies, using similar techniques.
Egg Carton Halloween Crafts FAQ
Q1: How difficult are these Egg Carton Halloween Crafts?
These crafts are beginner-friendly, making them accessible for both adults and children. Even those with little crafting experience can create wonderful decorations.
Q2: What materials do I need?
You will need egg cartons, paint, scissors, glue, markers, and optional items like googly eyes and string. Most of these materials are likely already in your home.
Q3: How should I store my finished crafts?
Store your crafts in a dry place and keep them away from direct sunlight to prevent fading or deterioration.
Q4: How long does it take to complete these crafts?
Most projects can be completed within 30 to 60 minutes, making them perfect for a quick DIY home decor session.
Q5: Can I customize these crafts further?
Absolutely! You can add different colors, use various materials, and change the designs to fit your preferences. The possibilities are endless.
CONCLUSION
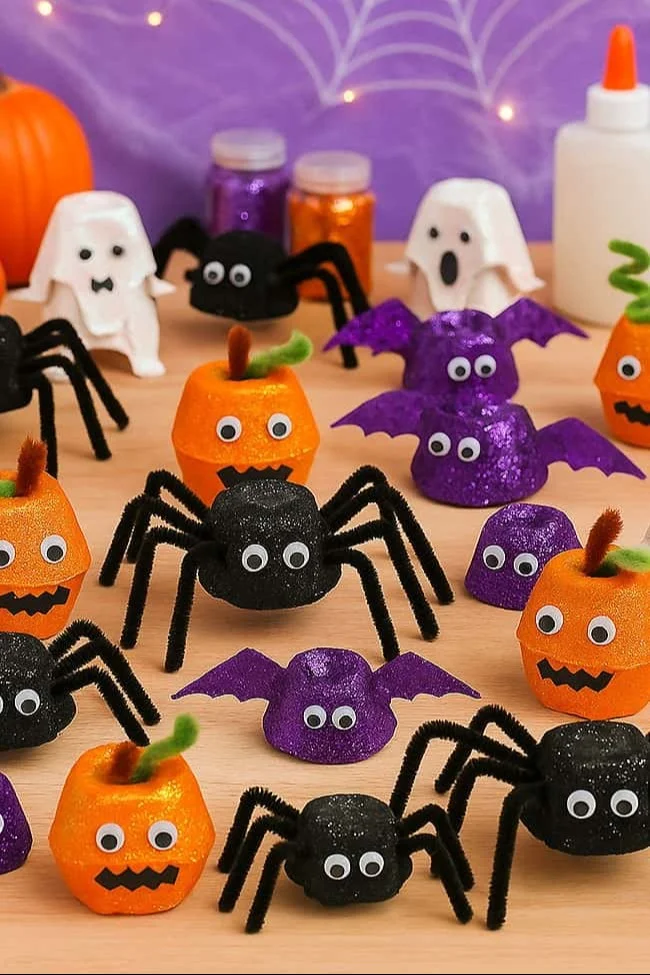
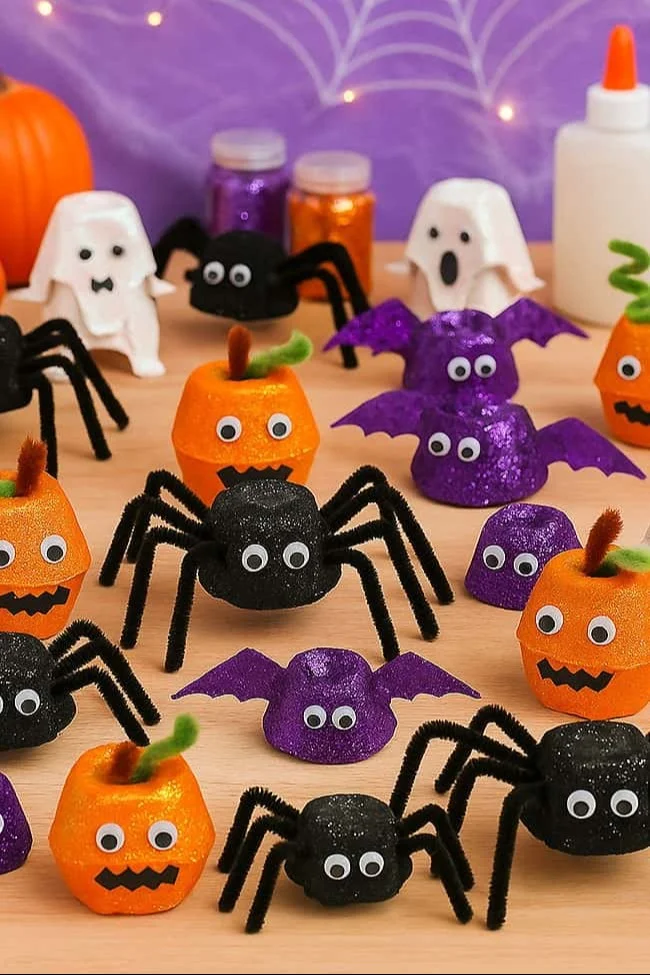
Creating Egg Carton Halloween Crafts is an easy and fun way to prepare for the holiday! Not only are these projects simple and beginner-friendly, but they also provide a fantastic opportunity for creativity and personalization. Whether you’re decorating your home or looking for a fun activity with kids, these budget-friendly crafts will add a festive touch to your celebration.
Now it’s time to get crafting! We hope you try these creative DIY ideas and share your experience and customization tips with us. Happy crafting!
Egg Carton Halloween Crafts
Ingredients
Method
- Cut the egg carton into sections with two cups for the bat's body and wings.
- Paint the cups black and let them dry completely.
- Cut out bat wings from another egg carton section, then paint and glue them to the bat's body.
- Add googly eyes and any additional decoration like glitter or stickers.
- Take a single cup from the egg carton and cut it down to the desired height.
- Paint the cup white and allow it to dry.
- Use a marker to draw a spooky face on your ghost.
- Cut a length of string or yarn, poke a small hole in the top of the cup, and tie the string through for hanging.
- Take one of the egg carton cups and cut off the top, leaving a base.
- Paint the cut piece black or any color you prefer.
- Cut pipe cleaners into equal lengths and poke them into the sides of the cup for legs.
- Glue googly eyes on the top to give your spider some character.
- Take two egg carton cups and paint them orange to form the pumpkin shape.
- Stack them on top of each other and glue them in place.
- Cut a small piece from a stick or bottle cap to serve as the pumpkin's stem and glue it on top.
- Decorate as desired to add a face or vines.