Halloween Pumpkin People Craft
Get ready to embrace the festive spirit this Halloween! The Halloween Pumpkin People Craft is a fun and easy DIY project perfect for both kids and adults. With just a few simple materials and a little creativity, you can create adorable pumpkin characters that not only serve as delightful decorations but also foster excitement during the Halloween season. This beginner-friendly craft is a great way to spend quality time with family and friends while making budget-friendly DIY home decor that showcases your creativity.
WHY YOU WILL LOVE THIS Halloween Pumpkin People Craft
Making Halloween Pumpkin People is a fantastic way to celebrate the spooky season while enjoying a creative outlet. Here are a few benefits of this easy craft:
- Easy for Beginners: This project is simple and straightforward, making it suitable for crafters of all skill levels.
- Uses Simple Materials: Most of the materials are likely to be found around your home or can be easily purchased, making this a cost-effective DIY project.
- Budget-Friendly: With inexpensive materials, this craft won’t break the bank.
- Quick to Make: You can complete this project in a short time, which is perfect if you’re looking for easy crafts for adults.
- Great for Home Decor: The finished pumpkin people can brighten up your home and add a festive touch to your Halloween decorations.
- Easy to Customize: Encourage creativity by allowing variations in colors, styles, and facial features, making each pumpkin person unique.
PROJECT DETAILS
Skill Level
Beginner – This craft is very easy to follow, making it perfect for newbies.
Estimated Time
Approximately 1 hour – This includes coloring, cutting, and assembling your pumpkin people.
Approximate Cost
Low – Most materials needed can be found at low prices, or you may already have them at home.
Best For
Home decor during Halloween or as handmade gifts for friends and family.
Project Type
Seasonal crafts – Ideal for Halloween parties or festive decorations.
TOOLS AND EQUIPMENT NEEDED
Scissors
Used for cutting out the pumpkin shapes and facial features. Make sure to use child-safe scissors if kids are involved in the craft.
Glue
Essential for attaching the various elements together, including the pumpkin face and arms or legs.
MATERIALS
Pumpkin Template
This printable template provides the basic outline for your pumpkin. It’s a great starting point for everyone, especially beginners.
Orange and Green Crayons or Markers
These will be used for coloring the pumpkins and their features. Feel free to use other colors for unique variations.
Green Construction Paper
Used to create arms and legs for the pumpkin people. This will add a touch of fun and movement to your characters.
Black Construction Paper
Perfect for making facial features like eyes and mouths, adding personality to your pumpkin designs.
Scissors
You’ll need scissors to cut out the pumpkin shapes and facial features effectively.
Glue
A strong adhesive will ensure all parts stay connected securely.
HOW TO MAKE Halloween Pumpkin People
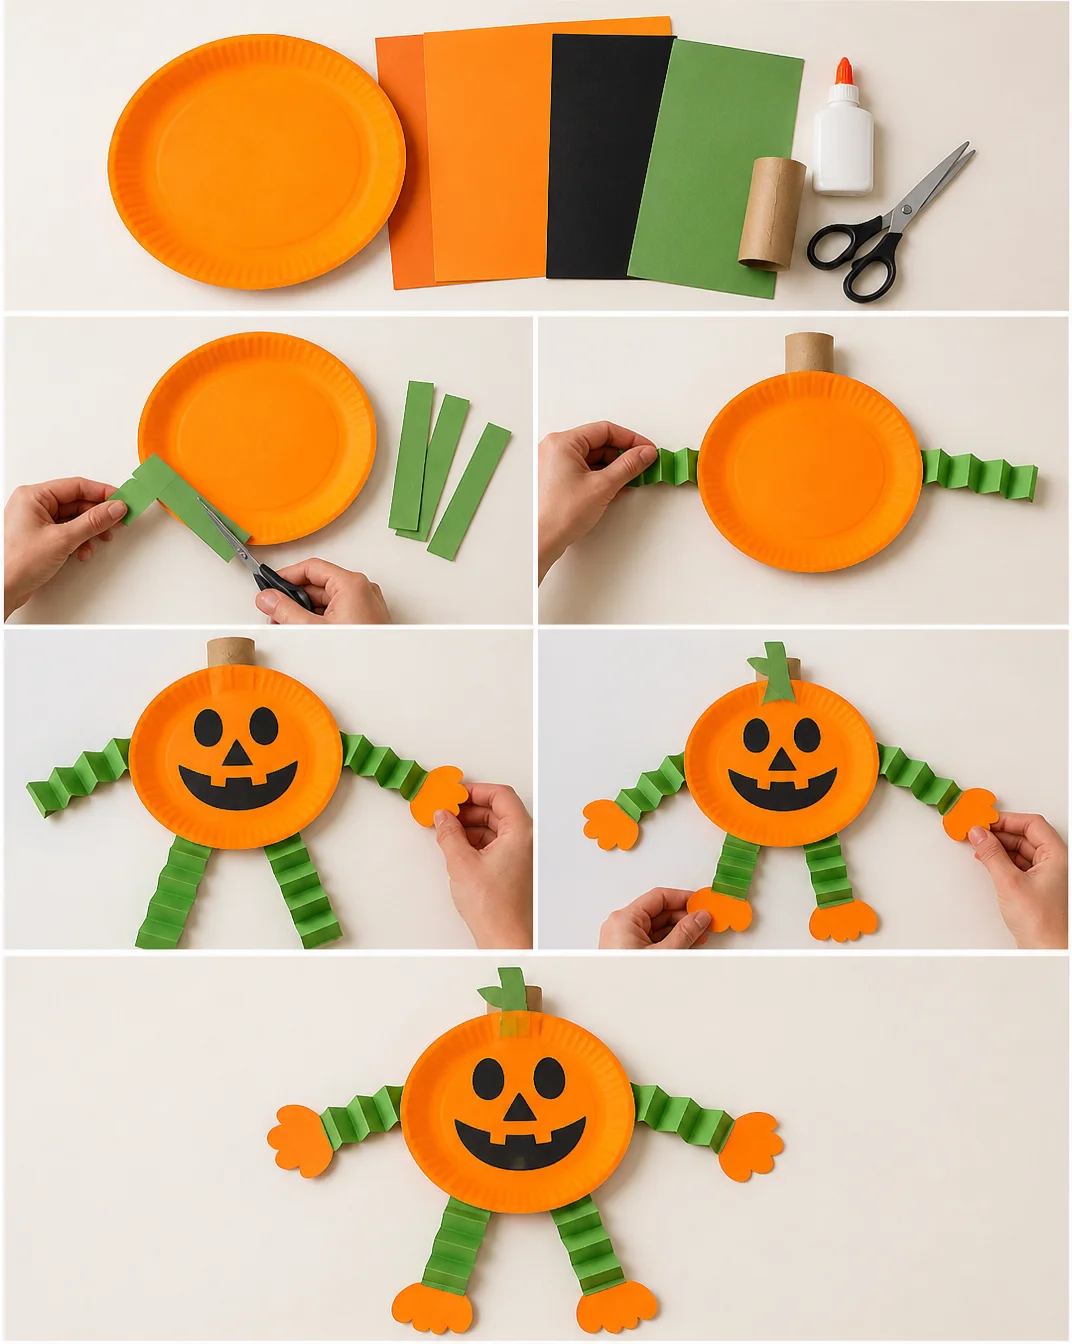
Creating your Halloween Pumpkin People is a fun and straightforward process. Just follow these easy steps:
Step 1: Print the Pumpkin Person Template
Start by printing the pumpkin person template. This will give you a clear outline for your project. You can find free templates online or draw your own.
Step 2: Color or Paint the Pumpkins
Using your orange and green crayons or markers, color in the printed pumpkin template. Feel free to use different shades for a more vibrant look.
Step 3: Carefully Cut Out the Pumpkin Shapes
Once colored, use scissors to cut out the pumpkin shapes. Take your time to ensure clean edges for a most polished look.
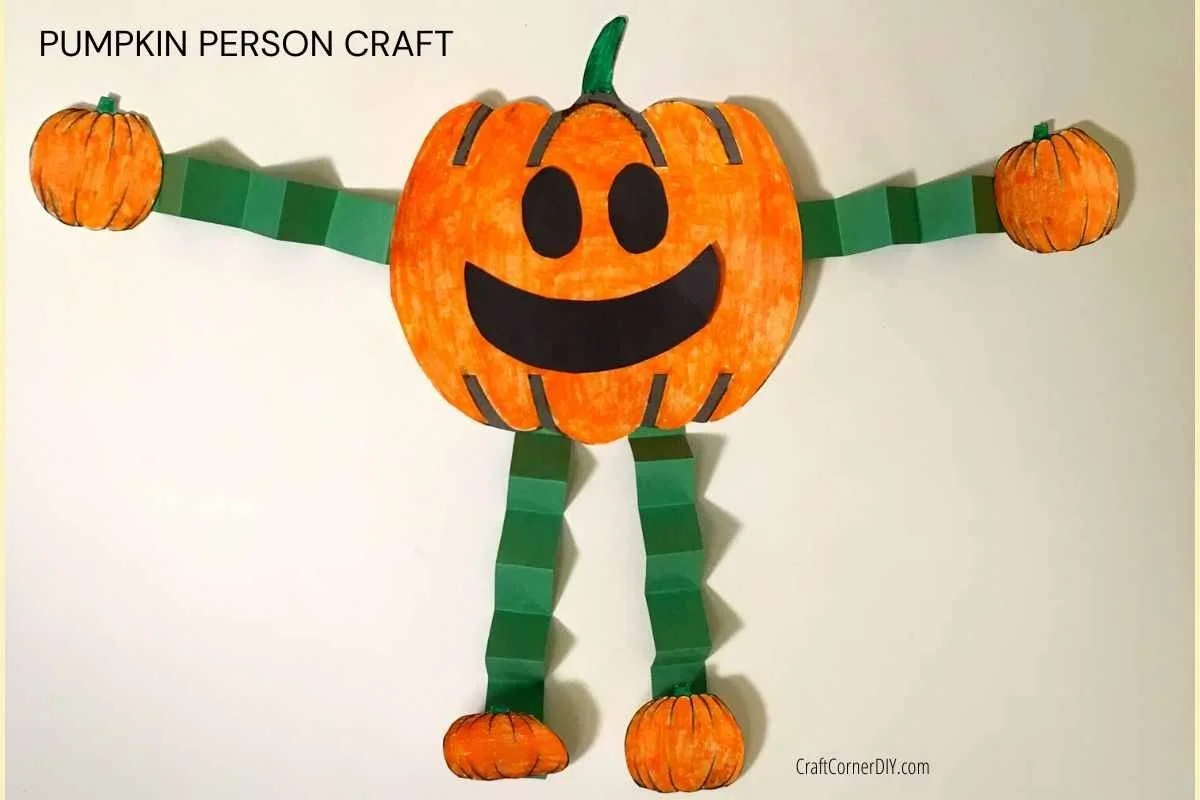
Step 4: Cut Out a Pumpkin Face from Construction Paper
Take black construction paper and cut out fun shapes for the eyes, mouth, and nose. This will give personality to your pumpkin person.
Step 5: Glue the Pumpkin’s Face to the Large Paper Pumpkin
Use glue to attach the facial features you’ve made onto the larger pumpkin shape. Ensure they are placed correctly so your pumpkin has character!
Step 6: Cut Green Construction Paper into Strips for Arms and Legs
Cut strips from the green construction paper. These will serve as arms and legs for your pumpkin person.
Step 7: Fold the Strips Accordion-Style for Movement
To add a playful touch, fold the green strips in an accordion style. This will allow the arms and legs to move slightly.
Step 8: Glue Strips for Arms to Each Side and Legs to the Bottom of the Pumpkin
Now it’s time to glue the strips onto your pumpkin character. Attach two strips on each side for arms and two strips at the bottom for legs.
Step 9: Attach Smaller Pumpkin Cutouts for Hands and Feet
If you want to add a flair, you can cut smaller pumpkin shapes for hands and feet from the leftover construction paper. Glue them at the ends of the strips you just added.
Step 10: Display Your Completed Pumpkin Person
Once everything is glued and dried, your pumpkin people are ready for display! Place them around your home for a festive touch or use them as part of a Halloween party centerpiece.
TIPS AND TRICKS
Here are some helpful tips to make your Halloween Pumpkin People Craft an enjoyable experience:
- Choosing Materials: Use materials you have on hand. Upcycling old crayons or markers can add character to your project.
- Cutting Techniques: If you have younger crafters involved, assist them with cutting. Use safe scissors for children.
- Gluing Tips: Allow glue to dry completely before displaying your pumpkin people. This will ensure they last longer.
- Avoiding Common Mistakes: If using a template, ensure that it is correctly aligned before tracing or cutting out your pumpkin shapes.
- Making the Project Easier: Use a paper cutter for straight edges if you have one; this will create cleaner cuts.
- Saving Money: Create a bigger batch of pumpkin people to enjoy or gift to friends, spreading the fun while saving on materials.
- Crafting Safely: Always supervise children during the crafting process, especially when using scissors and glue.
VARIATIONS AND CUSTOMIZATION IDEAS
Get creative by trying out these variations and customization ideas for your Halloween Pumpkin People Craft:
- Different Colors: Use non-traditional colors for pumpkins – blues and purples can create enchanting designs.
- Different Sizes: Create pumpkin people in various sizes for a fun display. You could even create a family of pumpkin characters!
- Different Materials: Use fabric scraps instead of construction paper for a unique touch on faces and limbs.
- Seasonal Versions: Change the facial expressions to represent different emotions and themes for any season.
- Holiday Versions: Try making pumpkin people that dress up in Halloween costumes for an added theme.
- Different Patterns: Use patterned scrapbook paper for a stylish effect, or let kids add stickers for decoration!
- Personalized Versions: Make each pumpkin person represent a family member or friend by customizing their features.
Halloween Pumpkin People Craft FAQ
Is this Halloween craft difficult?
No, this craft is very beginner-friendly. It involves simple steps that anyone can follow, making it ideal for all ages.
What materials do I need for this craft?
You will need a pumpkin template, orange and green crayons or markers, green construction paper, black construction paper, scissors, and glue.
How long does it take to complete this craft?
The project typically takes about 1 hour, depending on individual skill levels and the number of pumpkin people you decide to make.
How should I store my finished pumpkin people?
Store your pumpkin people in a cool, dry place, preferably in a box or container to protect them from getting crushed until you are ready to display them.
Can I clean these once they’re made?
If you need to clean your pumpkin people, use a dry cloth to wipe off dust. Avoid using water or cleaning solutions as they may damage the paper.
CONCLUSION
The Halloween Pumpkin People Craft is an easy, creative, and budget-friendly DIY project perfect for celebrating the Halloween season. With simple materials and clear steps, it’s an ideal craft for beginners and experienced crafters alike. This project provides a joyful way to create homemade decor that can be displayed proudly throughout the spooky season.
Try this fun craft out and bring your pumpkin people to life! Don’t forget to share your experience, finished projects, or customization ideas with friends and family. Happy crafting!
Halloween Pumpkin People
Ingredients
Method
- Print the Pumpkin Person Template.
- Color or paint the pumpkins using orange and green crayons or markers.
- Carefully cut out the pumpkin shapes with scissors.
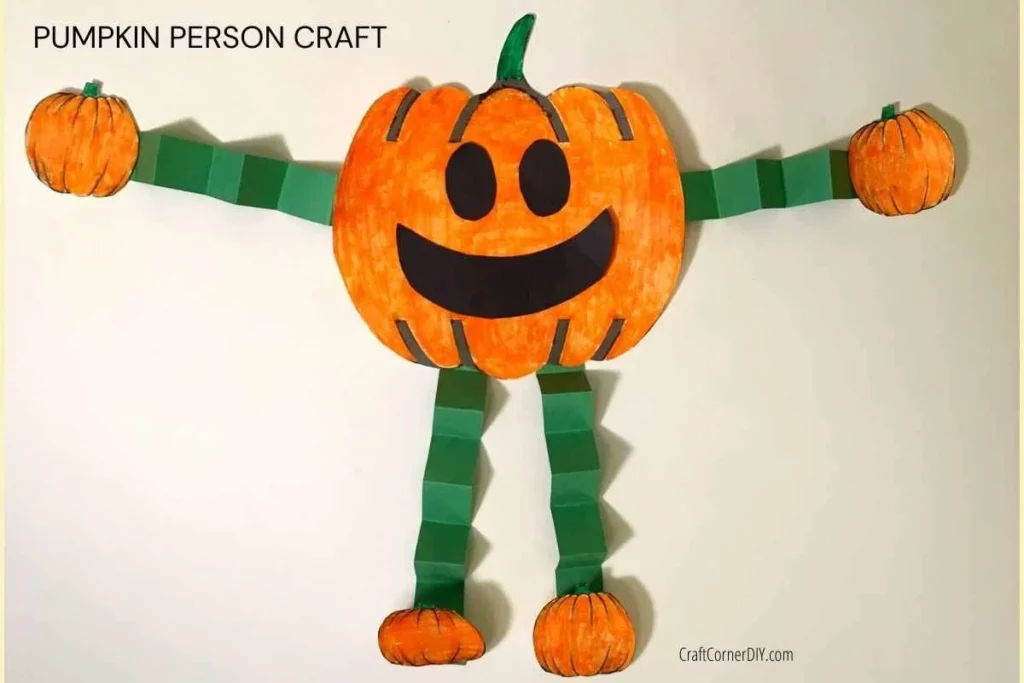
- Cut out facial features from black construction paper.
- Glue the facial features onto the larger pumpkin shape.
- Cut green construction paper into strips for arms and legs.
- Fold the green strips accordion-style for movement.
- Glue the strips onto the pumpkin character for arms and legs.
- Attach smaller pumpkin cutouts for hands and feet if desired.
- Display your completed pumpkin person around your home.