Fall Sensory Bottles
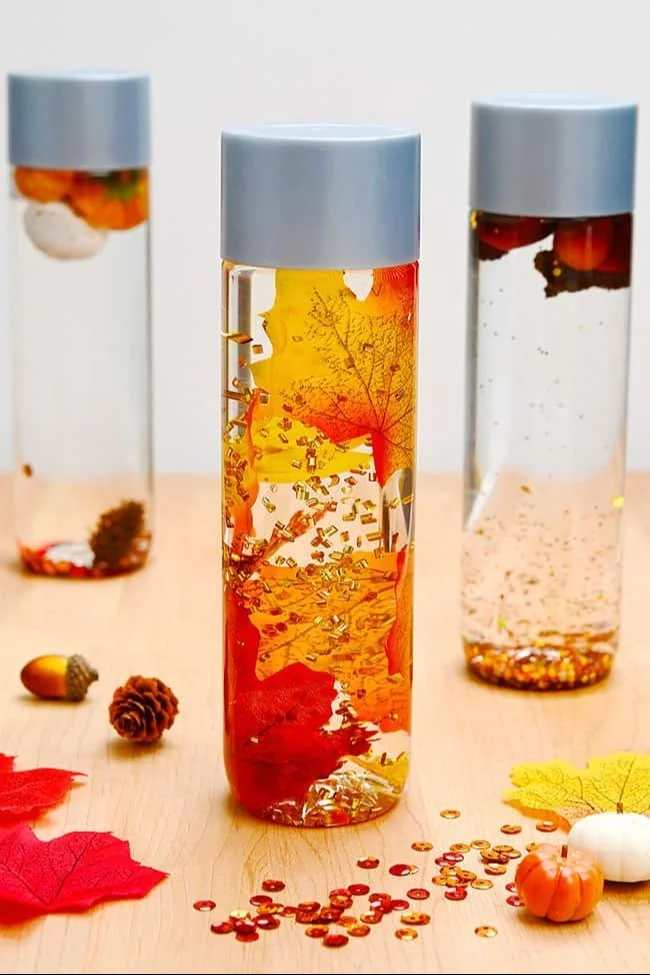
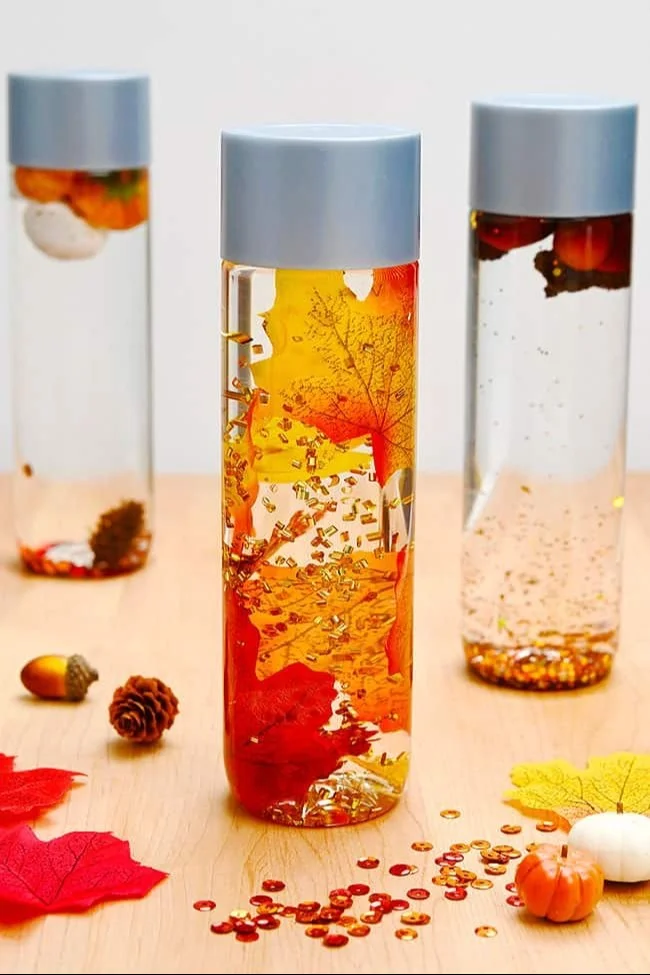
Fall Sensory Bottles are a wonderful and creative DIY project that offers a simple way to capture the essence of the autumn season. This easy craft is perfect for beginners, making it a fantastic option for anyone looking to create handmade decor or simple crafts. Not only do these sensory bottles serve as beautiful decorations, but they also provide a calming visual experience for both children and adults.
With just a few readily available materials and minimal effort, you can create a delightful sensory bottle that reflects the colors and feelings of fall. This craft is budget-friendly, easy to customize, and ideal for embracing the cozy spirit of the season. Let’s dive into the project!
WHY YOU WILL LOVE THIS Fall Sensory Bottle
Creating a Fall Sensory Bottle is an enjoyable and fulfilling experience. Here are some reasons why you will love making this easy DIY project:
- Easy for Beginners: This simple craft requires no advanced skills. Even if you’ve never done a DIY project before, you’ll find it straightforward.
- Uses Simple Materials: You likely have many of the materials at home, making this a hassle-free project.
- Budget-Friendly: Most supplies are inexpensive or can be sourced from your recycling bin, allowing you to create on a budget.
- Quick to Make: You can complete this project in under an hour, making it a perfect activity for a busy day.
- Great for Home Decor: Use your sensory bottles as eye-catching decorations for your living space or as gifts for friends and family.
- Great for Holidays or Seasonal Decorating: Ideal for fall-themed celebrations or Thanksgiving decor.
- Easy to Customize: You can use different materials and colors to make a personalized bottle that suits your style.
PROJECT DETAILS
Skill Level
This project is categorized as a beginner-friendly craft. No special skills or tools are needed.
Estimated Time
You can complete this craft in approximately 30 to 60 minutes, depending on your experience level.
Approximate Cost
The cost is very low, typically ranging from $5 to $15, depending on the materials you choose.
Best For
Fall Sensory Bottles are perfect for:
- Personal home decor
- Gifts for family and friends
- Seasonal or holiday decorations
- Classroom sensory tools
Project Type
This project falls under the category of simple crafts, upcycled crafts, and DIY home decor.
TOOLS AND EQUIPMENT NEEDED
Cleanser (Rubbing Alcohol)
You will need rubbing alcohol to clean the water bottle, ensuring that it’s free of labels or sticky residue.
Cotton Pad
A cotton pad or similar material is used to apply the rubbing alcohol for cleaning.
Scissors
Use scissors for cutting anything you may need to resize, such as fabric leaves or edges of confetti.
Hot Glue Gun (Optional)
A hot glue gun can be used to secure the cap of the sensory bottle for added safety.
MATERIALS
VOSS Water Bottle (500ml, Plastic)
This bottle serves as the base for your sensory project, providing a clear view of your beautiful autumn-themed contents.
Baby Oil
Fill the bottle with baby oil, creating a soothing water-like effect for the items inside.
Gold Bingsu Beads (or Tube Confetti)
Add these shiny beads or confetti to create visual interest and enhance the overall aesthetic of your sensory bottle.
Fall Leaf Confetti
The fall leaf confetti will be the star of your sensory bottle. It introduces great colors and embodies the season.
Fabric Leaves
These add texture and a more dynamic appearance to your sensory bottle, making it feel more like a piece of autumn.
HOW TO MAKE Fall Sensory Bottles
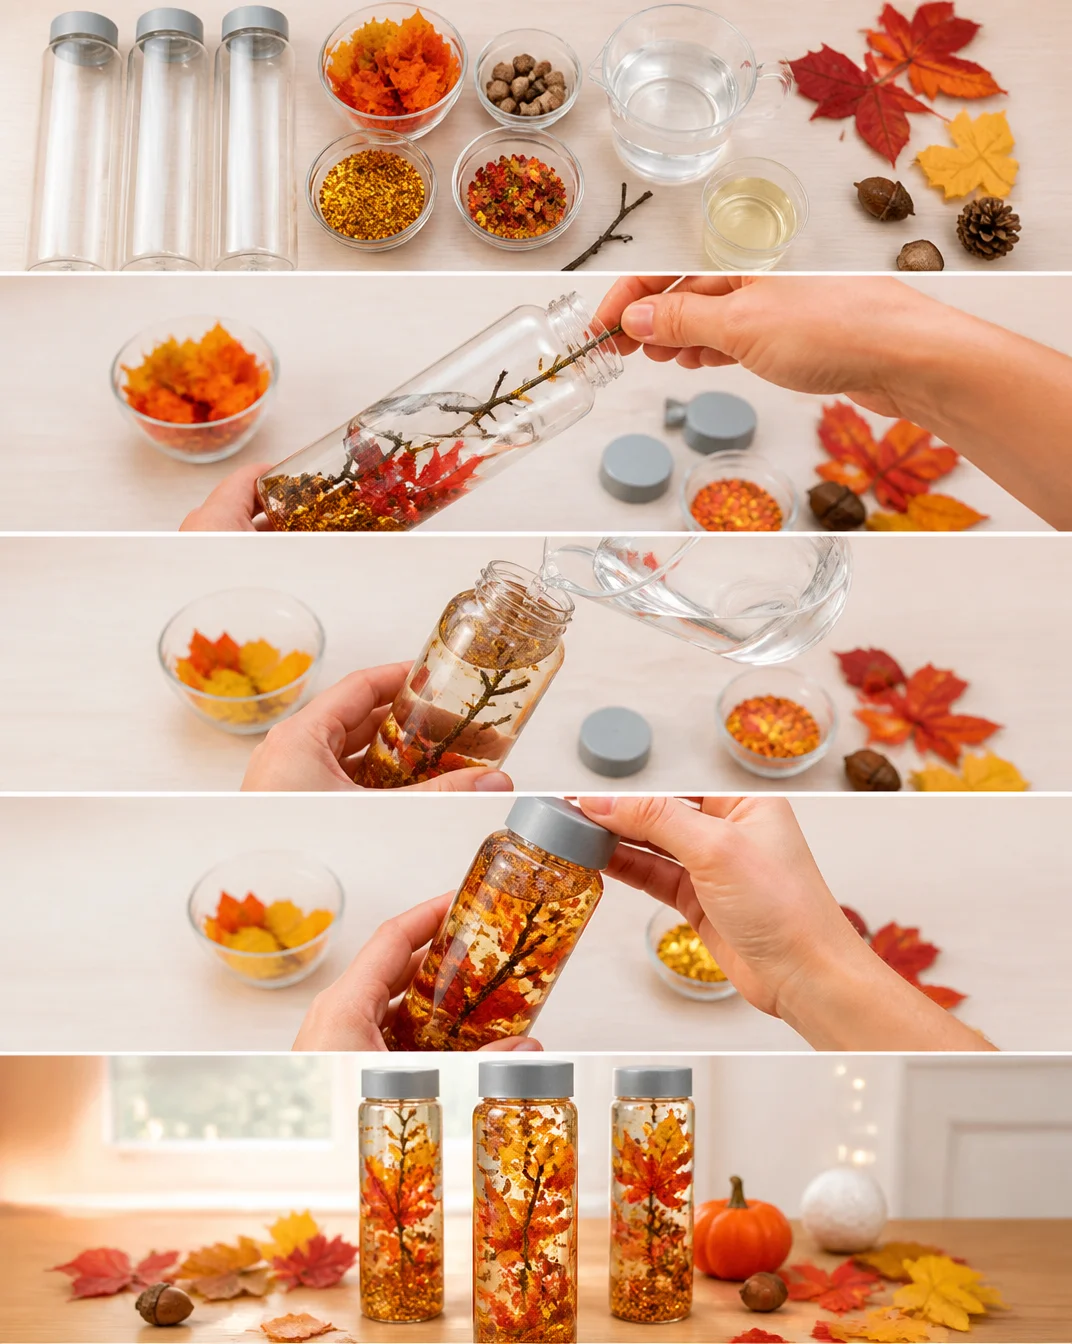
Step 1: Clean the Bottle
First, clean the water bottle and make sure to remove any labels. You can use rubbing alcohol on a cotton pad to wipe off sticky residue, or soak the bottle in hot soapy water for a few minutes before removing the label.
Step 2: Fill with Baby Oil
Next, fill the bottle three-quarters full with baby oil. This will help the confetti and leaves float around beautifully.
Step 3: Add Decorative Elements
Now, add approximately 1 tablespoon of gold bingsu beads and about 12 pieces of fall leaf confetti into the baby oil-filled bottle. Then, add 3 to 4 fabric leaves for added texture and charm.
Step 4: Top it Off
Carefully fill the remainder of the bottle with baby oil until it reaches the top. Ensure there is little to no air left inside the bottle for the best visual effect.
Step 5: Secure the Lid
Once filled, close the cap tightly. For safety, you can secure the lid with hot glue or super glue to prevent any spillage.
Step 6: Shake and Enjoy
Finally, shake the bottle to mix all the elements. Watch as the beads, leaves, and confetti swirl beautifully together.
TIPS AND TRICKS
- Choosing Materials: Make sure to use lightweight materials that will float and move well in the baby oil.
- Cutting Fabric Leaves: When cutting fabric leaves, use sharp scissors for a clean cut. Consider different shapes for added flair.
- Avoiding Common Mistakes: Don’t overfill the bottle; this can reduce the floating effect of the materials.
- Getting a Better Finish: If you find that the oil gets cloudy over time, you can replace it or add a few drops of clear glycerin to clear it up.
- Making the Craft Last Longer: Store the sensory bottles in a cool, dark place away from direct sunlight to prevent the colors from fading.
- Working Safely: Always supervise children if they are helping, especially when using hot glue.
VARIATIONS AND CUSTOMIZATION IDEAS
- Different Colors: Experiment with different colors or types of confetti to reflect other seasons or holidays, like Christmas or Halloween.
- Different Sizes: Use various sizes of bottles to create a set of sensory bottles.
- Seasonal Versions: Consider other seasonal themes, such as winter snow scenes or spring flowers, using similar methods.
- Personalized Versions: Add names or messages at the bottom using waterproof labels or stickers.
- Different Patterns: Mix in other decorative items like small pine cones, acorns, or beads in various colors.
Fall Sensory Bottles FAQ
Is this project suitable for beginners?
Yes, this DIY project is very beginner-friendly. You only need basic materials and tools, making it easy for anyone to follow along.
What materials do I need for the sensory bottle?
You’ll need a plastic water bottle, baby oil, gold bingsu beads (or tube confetti), fall leaf confetti, and fabric leaves to create your sensory bottle.
How can I store these sensory bottles?
Store your sensory bottles in a cool, dry place away from direct sunlight to help keep the colors vibrant and prevent fading.
How long does it take to make a Fall Sensory Bottle?
Typically, you can complete this craft in about 30 to 60 minutes, making it a quick and enjoyable activity.
Can I customize my sensory bottle?
Absolutely! You can use different colors, materials, and seasonal themes to make your Fall Sensory Bottle unique.
CONCLUSION
Creating Fall Sensory Bottles is an easy and enjoyable DIY project that anyone can embark on. This budget-friendly craft is perfect for home decor or as a thoughtful, handmade gift for loved ones. With simple materials and a straightforward process, it’s ideal for beginners and offers endless opportunities for customization.
Try making your own Fall Sensory Bottle and share your experience or tailored versions! Embrace the beauty of autumn with this creative DIY project.
Fall Sensory Bottle
Ingredients
Method
- Clean the water bottle thoroughly to remove all labels and sticky residue.
- Fill the bottle three-quarters full with baby oil.
- Add 1 tablespoon of gold bingsu beads and 12 pieces of fall leaf confetti to the bottle.
- Insert 3 to 4 fabric leaves.
- Top off the bottle with baby oil, ensuring there is little to no air left inside.
- Secure the lid tightly and, if desired, use hot glue for added safety.
- Shake the bottle and enjoy the swirling motion of the contents.