DIY Pumpkin String Art
Create a charming DIY Pumpkin String Art piece with this easy craft, perfect for bringing a touch of seasonal décor into your home. This simple DIY project combines creativity and fun, making it an excellent choice for beginners and experienced crafters alike. Using basic materials and easy-to-follow instructions, you’ll be able to craft a delightful piece of homemade décor that can be displayed for Halloween, Thanksgiving, or any time you want to celebrate autumn.
WHY YOU WILL LOVE THIS DIY PUMPKIN STRING ART
You’ll love creating this DIY Pumpkin String Art for many reasons. Here’s what makes this project so enjoyable:
- Easy for Beginners: This project is designed as a beginner-friendly craft. Even if you have little to no crafting experience, you’ll find the steps clear and simple to follow.
- Uses Simple Materials: The materials required are minimal and easily accessible, making it easy to gather what you need for your craft.
- Budget-Friendly: The project is cost-effective, with most materials available at an affordable price. It’s a great choice for anyone wanting to stay within a budget.
- Quick to Make: You can create this pumpkin string art in just a couple of hours, making it a perfect afternoon activity or a fun project to tackle on a weekend.
- Great for Home Décor: This pumpkin string art piece adds a festive touch to your home, making it a lovely addition to your autumn decorations.
- Easy to Customize: With endless color and design options, you can personalize your art to match your home décor or seasonal themes.
PROJECT DETAILS
Skill Level
Beginner: This craft is accessible for novices, making it a great choice for family crafting sessions or solo projects.
Estimated Time
2-3 hours: Depending on your crafting speed and familiarity with string art, you can complete it within this timeframe.
Approximate Cost
$15-$25: The cost may vary based on the materials you choose. However, it’s generally an affordable project.
Best For
Home Decor & Seasonal Decor: This project is perfect for decorating your home during the fall season or as a festive piece for get-togethers.
Project Type
DIY Craft: This project falls into the category of simple crafts that focus on creativity and enjoyable crafting experiences.
TOOLS AND EQUIPMENT NEEDED
Hammer
A hammer is essential for the project. You’ll be using it to drive the nails into the wood, so ensure you have a good-quality hammer on hand.
Scissors
You will need scissors to cut your embroidery thread to length. A sharp pair of scissors will make this task much easier and cleaner.
Tape
Tape is used to secure the pumpkin template to your wood board, ensuring it stays in place while you hammer in the nails.
MATERIALS
3/4 inch thick wood
You’ll need a stained wood piece that is roughly 10 x 10 inches in size. This serves as the base for your pumpkin string art. The thickness ensures stability.
Common nails
Select nails that are between 3/4 and 1 inch long. These will be used to create the outline of the pumpkin and are crucial for holding your string in place.
Pumpkin orange embroidery thread
You will need three skeins of pumpkin orange embroidery thread. This will be used primarily to fill in the pumpkin shape.
Brown embroidery thread
One skein of brown embroidery thread is needed for the pumpkin’s stem, providing a great contrast to the orange.
Dark orange embroidery thread
Two skeins of dark orange embroidery thread will be used for the border of the pumpkin, adding depth and dimension to your art piece.
Scissors
You’ll also need scissors to cut your embroidery thread as needed.
Tape
A roll of tape will help secure your pumpkin template to the wood base while you’re hammering in the nails.
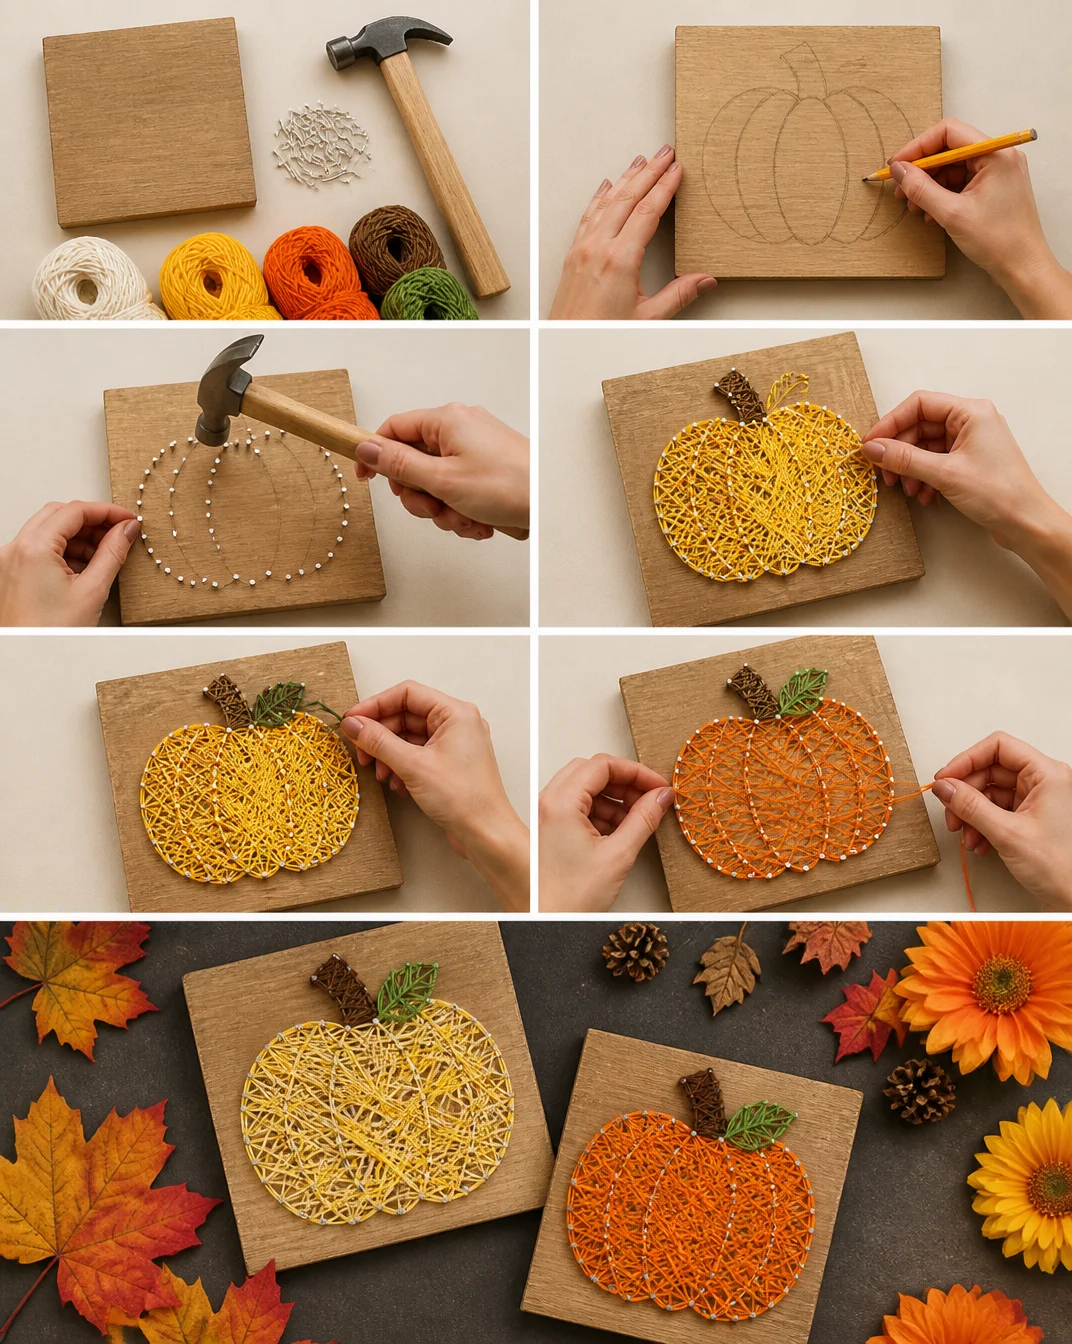
HOW TO MAKE DIY PUMPKIN STRING ART
Follow these simple steps to create your unique pumpkin string art.
Step 1: Gather Your Supplies
Collect all the supplies and materials listed above. Having everything at hand will make the crafting process smoother and more enjoyable.
Step 2: Print the Template
Find and print a pumpkin string art template. You can create your own or search online for free templates.
Step 3: Prepare Your Wood
Cut out the shape of the pumpkin template roughly. Tape it to the center of your wood board, aligning it properly to make sure it looks balanced.
Step 4: Hammer in the Nails
Using your hammer, carefully hammer nails around the outline of the pumpkin. Leave about 1/2 inch of each nail sticking out from the surface. Make sure the nails are evenly spaced—this will make the string art pattern more uniform.
Step 5: Start with the Pumpkin Orange Thread
Now it’s time to get crafting! Tie the pumpkin orange embroidery thread to one of the nails on the edge of the pumpkin. Begin weaving in a zigzag pattern from one nail to another.
Step 6: Fill in the Pumpkin
Continue filling the pumpkin shape by weaving the pumpkin orange thread back and forth between the nails. Make sure to cover the entire area until it is well filled and looks vibrant.
Step 7: Tie Off the Orange Thread
Once the pumpkin is fully covered, tie off the orange thread securely to one of the nails, making sure it’s tight so that it doesn’t come undone.
Step 8: Add the Stem
Now, switch to the brown embroidery thread. Tie one end of it to the nail at the top of the pumpkin (the stem area) and wrap it around the surrounding nails to create the shape of the stem.
Step 9: Create Borders with Dark Orange
Finally, take the dark orange embroidery thread and tie it to one of the nails around the edges of the pumpkin. Use a similar zigzag method to create a border around the pumpkin, wrapping the string around the nails until you complete your design.
Step 10: Final Touches
Ensure that all strings are tied off securely, and trim any excess thread. Remove the tape and template from the board. Your beautiful DIY Pumpkin String Art is now complete!
TIPS AND TRICKS
- Choose Quality Materials: For the best results, use quality embroidery threads. They are stronger and provide a neater finish.
- Uniform Spacing: When positioning nails, keep them equidistant from one another for a more professional look.
- Experiment with Patterns: Don’t stick only to the suggested pattern! Feel free to try different designs, colors, and arrangements.
- Take Your Time: If you’re new to string art, go slow. Enjoy the crafting process rather than rushing it.
- Secure Threads Well: Make sure to tie off your strings tightly to prevent any unraveling.
- Store Properly: If you need to take a break while crafting, store your materials in a safe place to avoid losing any pieces.
VARIATIONS AND CUSTOMIZATION IDEAS
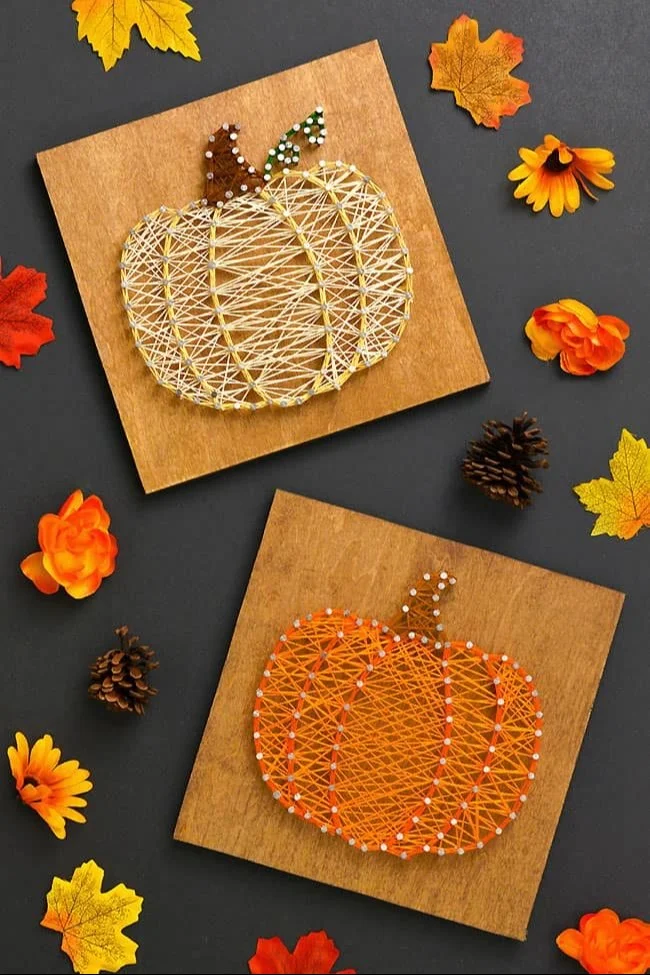
- Different Colors: Instead of the traditional pumpkin orange, opt for other fall colors like yellow or green to create different looks.
- Seasonal Versions: Create different shapes for various seasons, like a Christmas tree for the winter season or a heart for Valentine’s Day!
- Different Patterns: Try using different designs, such as adding embellishments like leaves or vines around the pumpkin.
- Personalized Versions: Add initials or names to the designs to make them special for gifts.
- Different Sizes: Customize the size of the pumpkin based on your available wall space, creating larger or smaller projects.
- Unique Finishes: Try painting the wood base before starting your project for a more customized touch.
DIY PUMPKIN STRING ART FAQ
1. Is this project suitable for children?
Yes, but it is advisable for adult supervision because of the hammering involved.
2. What type of wood is best for this project?
Using a piece of 3/4 inch thick wood is ideal for durability and ease of use.
3. Can I use other types of thread?
Absolutely! While embroidery thread is common, you can experiment with different types of string or twine for unique textures.
4. How long does it take to complete the project?
On average, you can expect it to take approximately 2-3 hours from start to finish.
5. How do I clean the finished craft?
You can use a dry cloth to dust off your string art. If it gets dirty, a slightly damp cloth will work well; just be cautious not to wet the wood excessively.
CONCLUSION
Creating DIY Pumpkin String Art is a delightful and easy craft that you can customize to your heart’s content. This beginner-friendly craft not only enhances your home décor for the fall season but also serves as a meaningful homemade gift. It’s budget-friendly and quick to make, making it perfect for busy individuals or families looking to enjoy creative time together.
Why not try your hand at this simple craft today? We’d love to see your finished projects and any customizations you come up with! Share your experience and let your creativity shine!
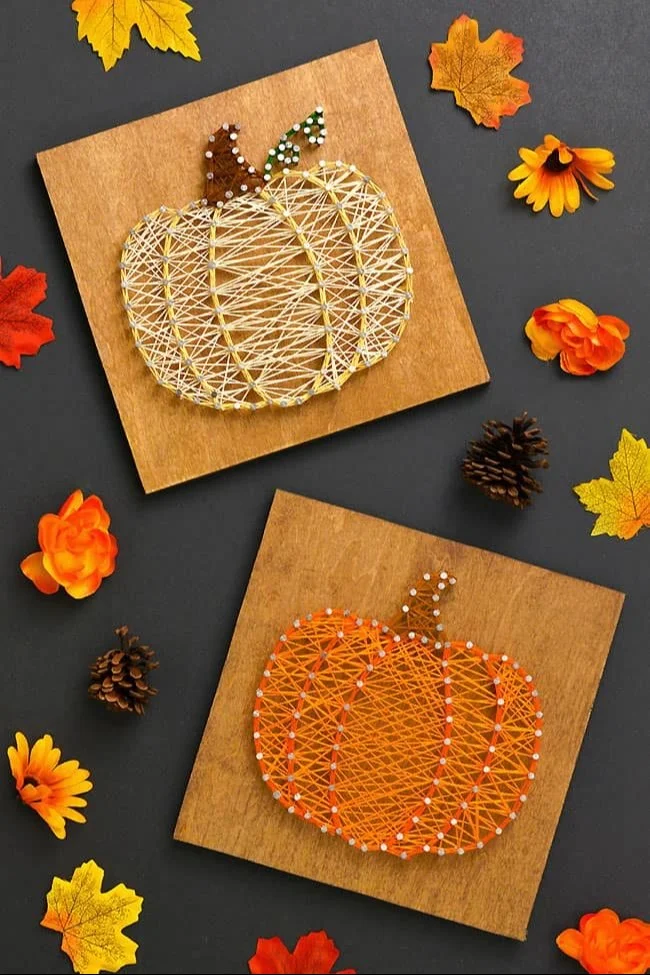
Pumpkin String Art
Ingredients
Method
- Gather all the supplies and materials listed above.
- Print a pumpkin string art template.
- Cut out the shape of the pumpkin template roughly and tape it to the center of your wood board.
- Carefully hammer nails around the outline of the pumpkin, leaving about 1/2 inch sticking out.
- Tie the pumpkin orange embroidery thread to one of the nails on the edge of the pumpkin and weave in a zigzag pattern.
- Continue filling the pumpkin shape by weaving the pumpkin orange thread back and forth.
- Once the pumpkin is fully covered, tie off the orange thread securely to one of the nails.
- Switch to the brown embroidery thread to create the shape of the stem.
- Use dark orange embroidery thread to create a border around the pumpkin.
- Ensure all strings are tied off securely and trim any excess thread.
- Remove tape and template; the DIY Pumpkin String Art is now complete.