Candy Melt Pumpkin Bowls
Candy Melt Pumpkin Bowls are a delightful and fun DIY craft that is perfect for Halloween or autumn celebrations. This easy DIY project combines creativity and yummy treats, making it an engaging activity for all ages. With just a few basic materials, you can create charming pumpkin bowls that can be filled with candies, snacks, or other seasonal goodies. Whether you are a beginner looking for simple crafts to enhance your home or want to create handmade gifts for your friends, this craft provides a fantastic way to express your creativity.
WHY YOU WILL LOVE THIS Candy Melt Pumpkin Bowls
Making Candy Melt Pumpkin Bowls is a fantastic craft that offers numerous benefits to DIY enthusiasts and beginners alike. Here are some reasons why you will enjoy this easy craft:
- Easy for Beginners: This DIY project is straightforward, making it ideal for those new to crafting.
- Uses Simple Materials: The materials can be found easily at local stores, making this project accessible to everyone.
- Budget-friendly: With minimal costs, you can create beautiful decorations without breaking the bank.
- Quick to Make: You can complete this craft in under an hour, making it perfect for last-minute holiday decorations or treats.
- Great for Home Decor: These pumpkin bowls add a lovely seasonal touch to your home.
- Perfect for Gifts: Fill these bowls with treats for thoughtful and personalized homemade gifts.
- Seasonal Decorating: Perfect for Halloween and fall festivities, they bring a joyful spirit to any gathering.
- Easy to Customize: You can personalize your pumpkin bowls in various ways, enhancing the fun and creativity.
PROJECT DETAILS
Skill Level
Beginner-friendly. This project is designed so that anyone, regardless of skill level, can create beautiful pumpkin bowls with ease.
Estimated Time
Approximately 30-45 minutes excluding cooling time. This includes preparation, crafting, and decorating.
Approximate Cost
Around $10-15. This is an affordable craft that requires only a few ingredients, allowing you to create charming decorations on a budget.
Best For
Family activities, seasonal crafts, parties, holiday decorations, or handmade gifts.
Project Type
Crafts for beginners, holiday crafts, and DIY home decor.
TOOLS AND EQUIPMENT NEEDED
Microwave-safe Bowl
This is used for melting the candy melts. Ensure it is suitable for microwave use to prevent any damage.
Tray or Lined Baking Sheet
You will need this to place the dipped balloons on while they cool and set.
Paring Knife
A small knife used for trimming the top of the candy bowl for an even finish.
Food Decorating Pen
This allows you to draw fun faces or designs on your pumpkin bowls.
MATERIALS
12 Ounce Bag of Orange Candy Melts
These candy melts are essential for creating the pumpkin bowl’s base. They melt into a smooth mixture that hardens into a solid shape.
8 Small Balloons (5 Inch Size)
These balloons serve as the mold for your bowls. They define the shape of the bowl as the candy hardens around them.
Food Decorating Pen (Black)
The pen is used to draw designs on the finished bowls, allowing for personalization and creative expression.
HOW TO MAKE Candy Melt Pumpkin Bowls
Follow these simple steps to create your own Candy Melt Pumpkin Bowls.
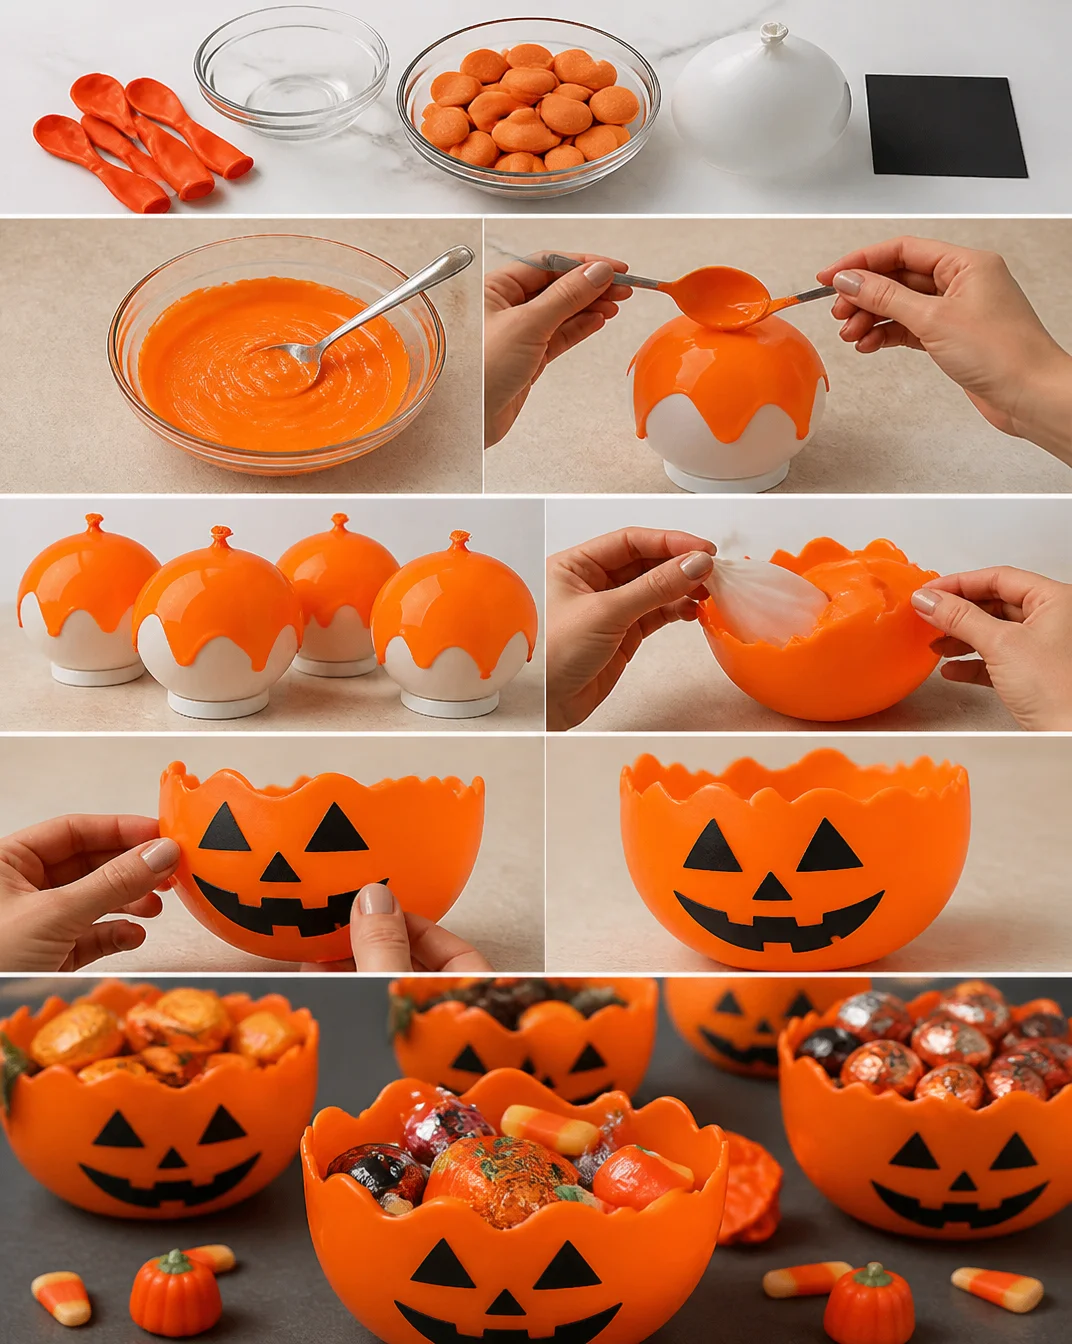
Step 1: Melt the Candy Melts
Pour a package of orange candy melts into a microwavable bowl. Microwave according to the package directions, stirring until the mixture is smooth and fully melted.
Step 2: Prepare the Balloons
Blow up a balloon to about 3 inches in diameter and tie a knot. Repeat this step with seven more balloons, ensuring they are all evenly inflated.
Step 3: Dip the Balloons
Carefully dip each balloon into the melted candy melts, covering the bottom half evenly. This will form the base of your pumpkin bowl. Place each balloon on a lined tray as you go.
Step 4: Cool the Dipped Balloons
Transfer the tray to the refrigerator and let the dipped balloons cool for about 20 minutes or until the candy has fully set.
Step 5: Deflate and Remove the Balloons
Once the candy has cooled and hardened, use a paring knife to cut a tiny hole near the knot of each balloon. This will allow the balloon to deflate slowly. Carefully peel the balloon away from the candy bowl.
Step 6: Trim the Top
Use the paring knife to cut the top of the bowl for an even finish, adjusting as necessary to ensure an appealing shape.
Step 7: Decorate Your Pumpkin Bowls
Using the food decorating pen, draw a jack-o-lantern face or any fun design on the outside of your candy bowls. This will add personality and charm to your pumpkins.
Step 8: Fill and Enjoy
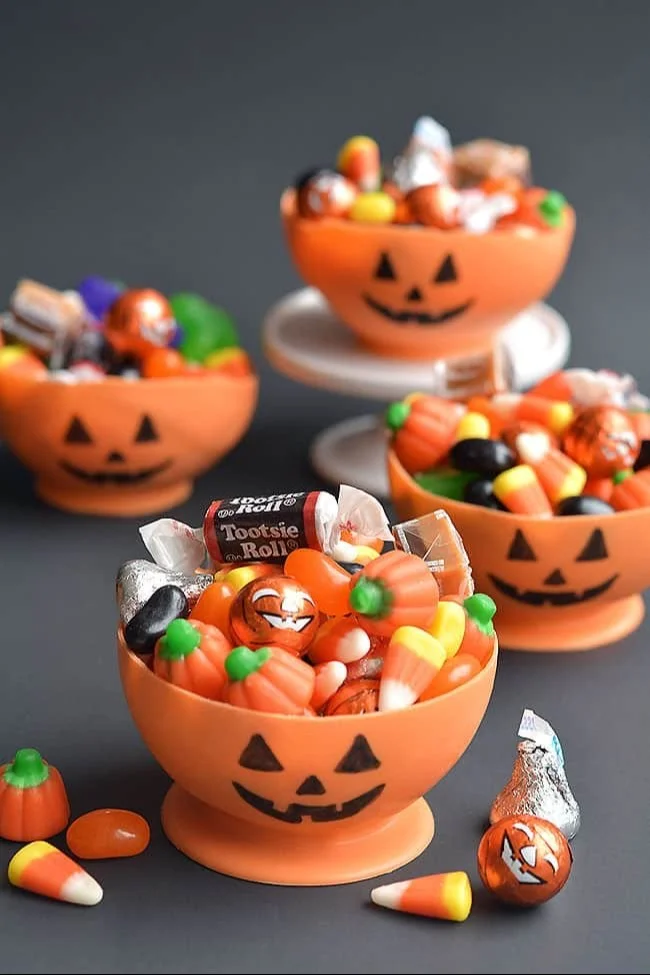
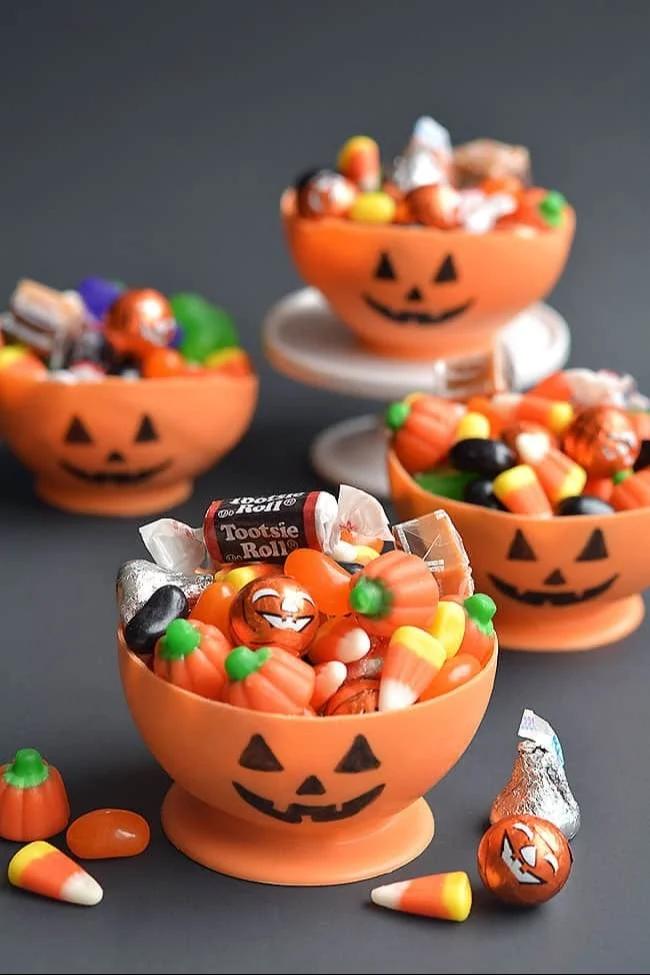
Fill the pumpkin bowls with Halloween treats, candies, or snacks, and display them at your next party or gathering. Enjoy your festive creations!
TIPS AND TRICKS
-
Choose Quality Candy Melts: Higher quality candy melts melt smoothly and set evenly, helping you get better results for your pumpkin bowls.
-
Balloon Size Matters: For the best results, ensure your balloons are correctly sized. Bigger balloons will create larger bowls, while smaller balloons make mini bowls.
-
Avoid Overheating Candy: Heat the candy melts in short intervals of 30 seconds. Overheating can cause the candy to burn and lose its consistency.
-
Use a Clean Surface: Make sure your work area is clean for a smooth crafting experience. A clean surface helps with easy cleanup and avoids contamination.
-
Be Gentle with Balloons: When removing the balloons, do so gently to avoid cracking the candy. Patience is key!
-
Storage: Store your completed candy bowls in a cool, dry place. If not filled, they can last for several days, but avoid humidity and heat which can soften the candy.
VARIATIONS AND CUSTOMIZATION IDEAS
-
Different Colors: Use different colors of candy melts to create a variety of pumpkin colors, like green or even white for a ghostly feel.
-
Various Sizes: Try using larger or smaller balloons to create different-sized bowls for a unique display.
-
Seasonal Versions: Switch the colors and designs for other holidays. Use red and green for Christmas, or pastel colors for Easter.
-
Custom Patterns: Instead of a traditional jack-o-lantern face, explore other designs like spider webs or fun shapes like stars and hearts.
-
Add Glitter or Sprinkles: Before the candy hardens completely, add edible glitter or Halloween-themed sprinkles for extra flair.
-
Use Chocolate Melts: For a richer flavor, try using chocolate candy melts alongside the orange for a chocolatey treat!
Candy Melt Pumpkin Bowls FAQ
1. How difficult is this craft?
This project is beginner-friendly and easy, making it perfect for anyone, even those with little crafting experience.
2. What materials do I need?
You will need orange candy melts, small balloons, and a black food decorating pen.
3. How do I store the finished bowls?
Store your pumpkin bowls in a cool, dry environment. If possible, keep them in an airtight container if they are not filled.
4. Can I customize the pumpkin bowls?
Yes! You can add different colors, sizes, and personal designs to make each bowl unique and according to your personal style.
5. How long does this project take to complete?
The hands-on crafting time is about 30-45 minutes, but don’t forget to include the cooling time of about 20 minutes in the fridge.
CONCLUSION
Creating Candy Melt Pumpkin Bowls is a delightful and easy DIY project that adds festive flair to your home décor. This craft is beginner-friendly and uses simple, budget-friendly materials, making it accessible for everyone. Not only are these pumpkin bowls perfect for seasonal décor and gifts, but they also provide a creative outlet for personalization.
Join the fun and see how easy it is to make these charming treats. Gather your materials, follow the simple steps, and make your Candy Melt Pumpkin Bowls today! Don’t forget to share your creations and any customization ideas with others. Happy crafting!
Candy Melt Pumpkin Bowls
Ingredients
Method
- Step 1: Melt the Candy Melts - Pour a package of orange candy melts into a microwavable bowl. Microwave according to the package directions, stirring until smooth and fully melted.
- Step 2: Prepare the Balloons - Blow up a balloon to about 3 inches in diameter and tie a knot. Repeat for seven more balloons, ensuring they are evenly inflated.
- Step 3: Dip the Balloons - Carefully dip each balloon into the melted candy melts, covering the bottom half evenly and place on a lined tray.
- Step 4: Cool the Dipped Balloons - Transfer the tray to the refrigerator for about 20 minutes or until the candy sets.
- Step 5: Deflate and Remove the Balloons - Cut a tiny hole near the knot of each balloon to deflate it slowly, then peel it away from the candy bowl.
- Step 6: Trim the Top - Use the paring knife to cut the top of the bowl for an even finish.
- Step 7: Decorate Your Pumpkin Bowls - Use the food decorating pen to draw a jack-o-lantern face or any fun design on the bowls.
- Step 8: Fill and Enjoy - Fill the pumpkin bowls with Halloween treats, candies, or snacks and display them.