Halloween Perler Beads | FREE Halloween Perler Bead Patterns
Every Halloween, a wave of creativity sweeps through homes as families look for delightful DIY projects to celebrate the spooky season. One exciting way to join in the fun is by making Halloween Perler beads crafts! This easy DIY project allows crafters of all skill levels to create unique, colorful patterns that can be used for decorations or even as handmade gifts. In this article, we’ll explore the world of Halloween Perler beads, provide free patterns, and guide you through this enjoyable and simple craft!
WHY YOU WILL LOVE THIS Halloween Perler Beads Project
Creating Halloween Perler beads crafts is a fantastic way to get into the holiday spirit! Here are a few reasons why this project is perfect for you:
- Easy for Beginners: With straightforward instructions, even those new to crafting can create fun designs.
- Uses Simple Materials: The materials needed are basic and easily accessible.
- Budget-Friendly: You can make these crafts without breaking the bank, perfect for crafty individuals on a budget.
- Quick to Make: Many designs can be completed in a short amount of time, making them ideal for last-minute decorations or gifts.
- Great for Home Decor: Finished projects can decorate your home for Halloween, adding a personal touch to your seasonal decor.
- Fun for Gifts: Personalized bead creations can be thoughtful gifts that show your creativity.
- Easy to Customize: You can modify colors or patterns to fit your style and preference!
PROJECT DETAILS
Skill Level
Beginner-friendly – This project is simple enough for crafters of all ages.
Estimated Time
1-2 hours – Depending on the complexity of your design and your speed.
Approximate Cost
$10-$20 – Most materials are inexpensive and can be reused for future projects.
Best For
Halloween enthusiasts, families looking to bond over crafts, or anyone wanting to create unique decorations.
Project Type
Seasonal crafts for home decor or gifting.
TOOLS AND EQUIPMENT NEEDED
Iron
You will need a standard household iron to fuse the beads together.
Parchment Paper
This protects your iron and the beads while you melt them together.
Tweezers (Optional)
These can help you place the beads more accurately, especially for intricate designs.
Perler Bead Tray (Optional)
A tray or board specifically designed for arranging your Perler beads can make your crafting easier and more organized.
MATERIALS
Perler Beads
These colorful beads are the primary material used to create your designs. They come in various colors and can often be purchased in themed packs for Halloween.
Perler Bead Tray
This tray typically has a grid design, allowing you to arrange the beads easily into your desired shape.
Ironing Paper
This special paper can withstand heat and should be used to cover your bead creations when pressing them with the iron.
HOW TO MAKE Halloween Perler Beads Crafts
Creating Halloween Perler beads is an enjoyable process. Follow these steps to create your custom decorations!
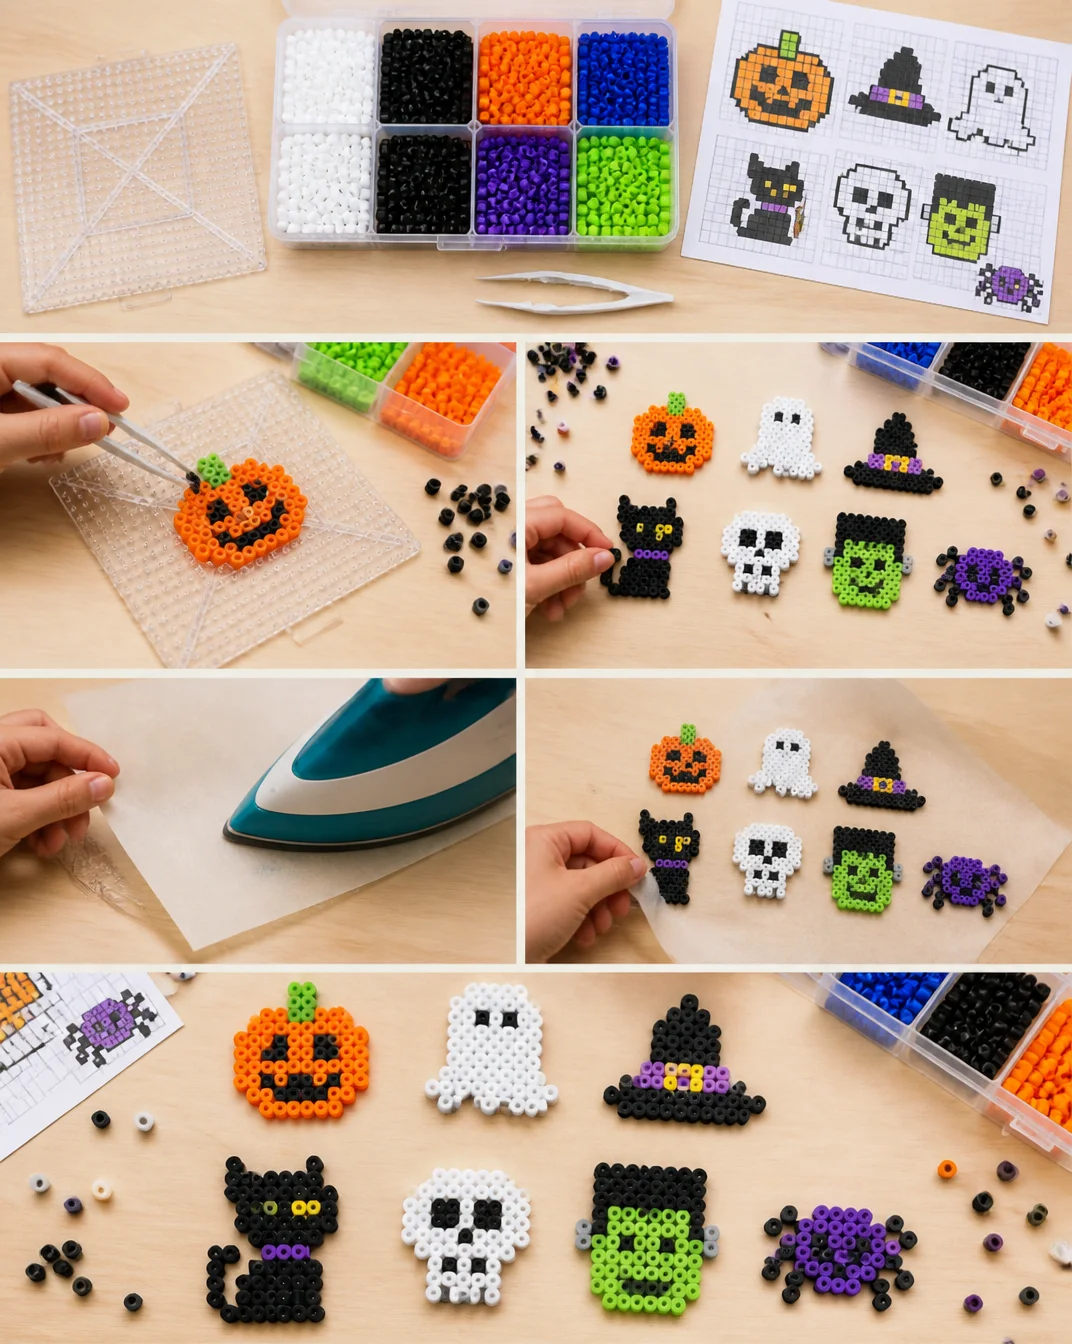
Step 1: Choose Your Design
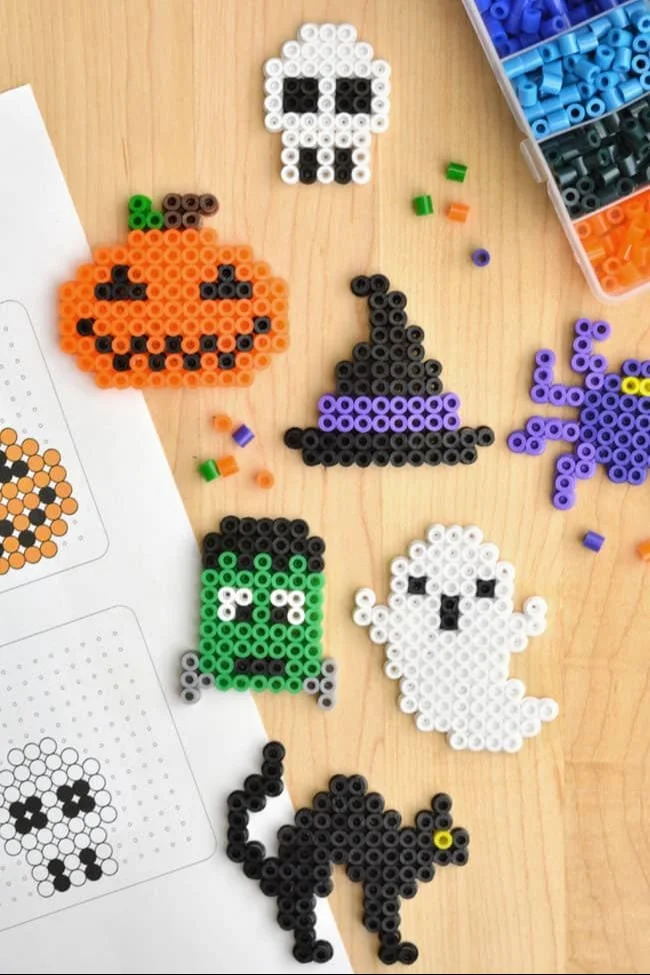
Select one of the free Halloween patterns you want to make. Common designs include pumpkins, ghosts, witches, and bats, allowing plenty of room for creativity.
Step 2: Arrange Your Beads
Using your Perler bead tray, begin laying out the beads in the pattern of your choice. Use tweezers if needed to precisely position the beads. Don’t be afraid to mix colors to create a vibrant design!
Step 3: Prepare to Iron
Once your design is complete, carefully place a piece of ironing paper over the beads. This step is crucial to prevent the beads from sticking to the iron directly.
Step 4: Melt the Beads
Heat the iron to a medium setting without steam. Gently press the iron down on the parchment paper for about 10-15 seconds. Check to see if the beads have fused together. If not, add a little more heat, taking care not to let them melt excessively.
Step 5: Cool and Remove
Allow your creation to cool down completely for a few minutes. Once cool, carefully peel back the parchment paper to reveal your fused Perler beads masterpiece!
Step 6: Finishing Touches
If you want, you can glue a magnet to the back for fridge decorations or string a ribbon through the top to hang your creation.
TIPS AND TRICKS
- Choosing Beads: Look for themed packs for convenience or buy individual colors for a personalized touch.
- Be Patient: When ironing, apply even pressure and check frequently to avoid over-melting.
- Common Mistakes: Avoid overcooking the beads, as they can lose their form and become too soft. Always monitor the melting process.
- Display Ideas: You can frame the finished products or use them as part of a Halloween-themed table centerpiece or garland.
- Cost-Saving: Use leftover beads from previous crafts to create new designs. This project is a great way to upcycle!
- Safety Tips: Always supervise children when using the iron and ensure they know how to handle it safely.
VARIATIONS AND CUSTOMIZATION IDEAS
- Different Colors: Customize your designs by using your favorite color combinations or Halloween-themed colors.
- Larger Sizes: Make bigger designs by using larger beads or combining multiple patterns to create a banner.
- Seasonal Versions: Create variations for other holidays by changing the shapes and colors. Think hearts for Valentine’s Day or stars for the Fourth of July!
- Different Patterns: Search online for other holiday-themed patterns to continue crafting throughout the year.
- Personalized Designs: Incorporate initials or names into your crafts for a unique touch, making great handmade gifts!
Halloween Perler Beads FAQ
How difficult is this craft?
This craft is beginner-friendly and straightforward. Anyone can follow the steps, making it perfect for children and adults alike.
What materials do I need?
You will need Perler beads, an iron, parchment paper, and sometimes a bead tray or tweezers for easier handling.
How long does it take to complete a project?
Typically, you can create a design in 1-2 hours, depending on its complexity and size.
Can I store my finished crafts, and how should I care for them?
Yes! You can store your finished crafts in a cool, dry place. They are fairly durable but handle them gently to avoid breaking.
How can I customize my designs?
You can change colors, use different patterns, or add personal touches like names or seasonal elements to make your crafts unique.
CONCLUSION
Creating Halloween Perler beads crafts is an excellent way to celebrate the spooky season with creativity and fun. This easy DIY project requires simple materials, making it accessible to everyone, including beginners. You can use your creations for Halloween decorations, gifts, or as a fun activity with friends and family. So, gather your supplies, choose a pattern, and start crafting! Don’t forget to share your experience and any customization ideas you come up with! Happy crafting!
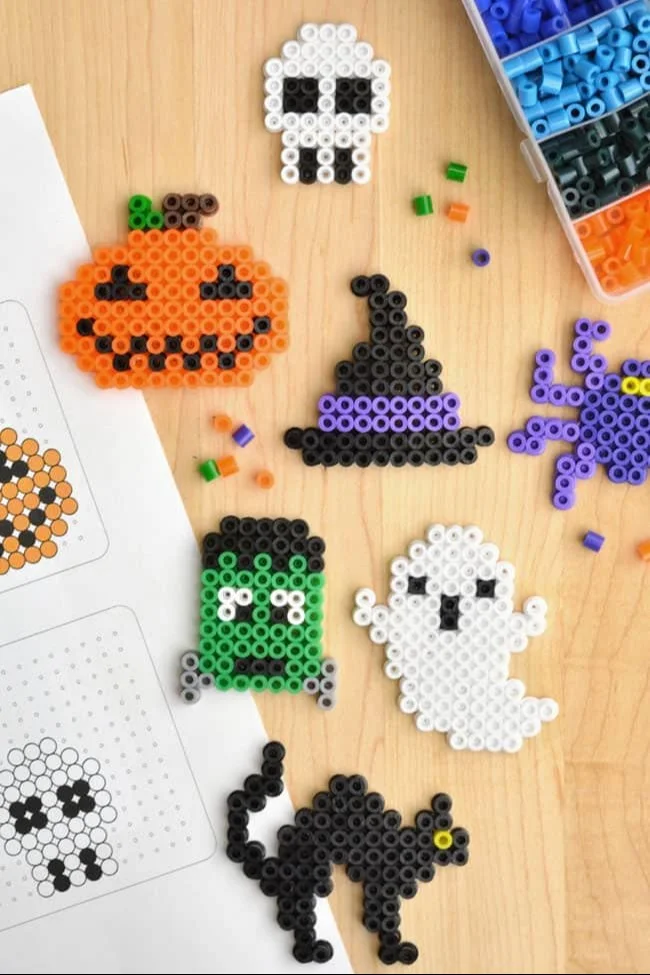
Halloween Perler Beads Crafts
Ingredients
Method
- Choose your design from free Halloween patterns, like pumpkins or bats.
- Arrange your beads in the design using the Perler bead tray. Use tweezers if desired.
- Prepare to iron by placing a piece of ironing paper over the beads.
- Heat the iron to medium and press it down on the parchment paper for 10-15 seconds.
- Allow the creation to cool for a few minutes before carefully peeling back the parchment paper.
- Add finishing touches like gluing a magnet for fridge decorations.